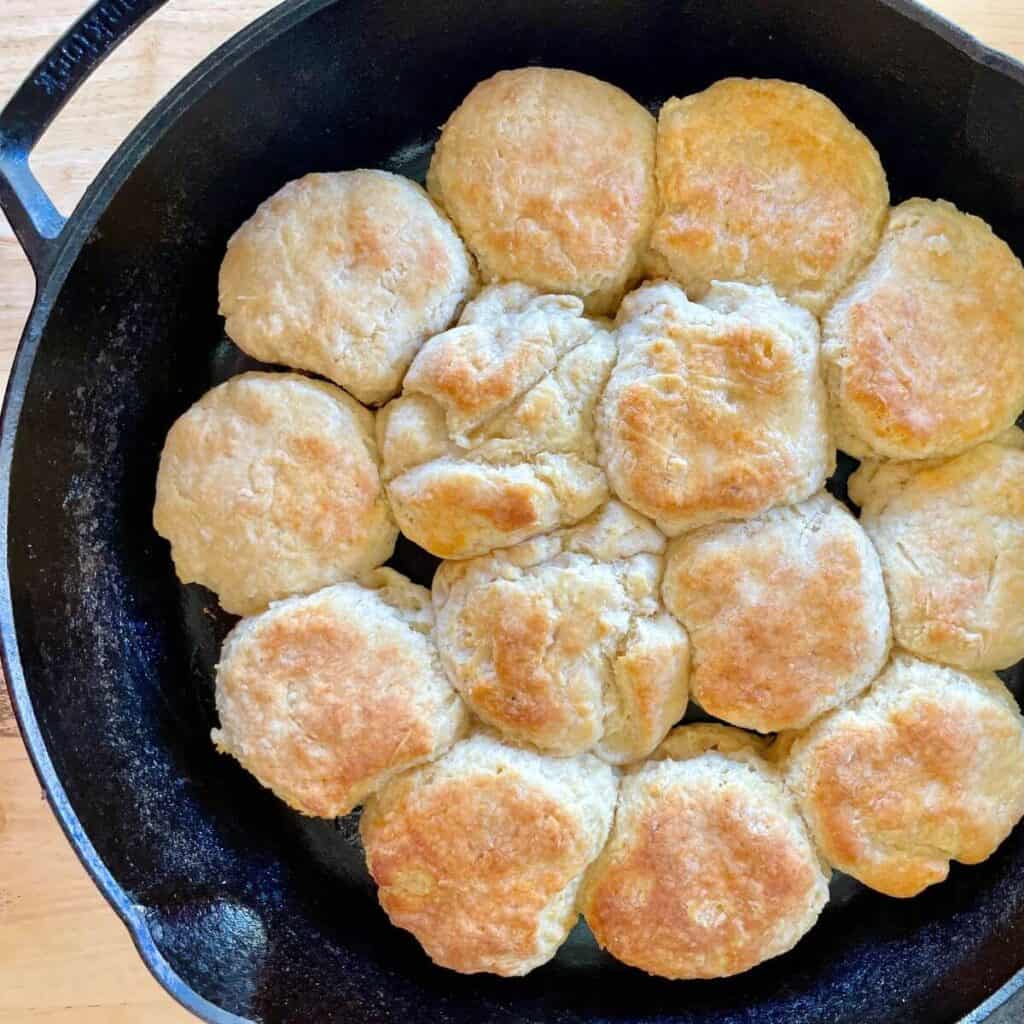
I’ve been on a quest to find the best cast iron skillet biscuits for a while now… And after multiple attempts and a whole lot of almost-perfect biscuits consumed, I think I’ve nailed down my new favorite homemade buttermilk biscuit recipe.
Sometimes it’s easier to just grab a can of Pillsbury Grands and pop them in the oven, but every now and then I like to make my own buttermilk biscuits from scratch. And these cast iron skillet biscuits are fantastic! Even after the leftover biscuits had been sitting on the counter for 3 days, they were still soft and fluffy… that’s a darn good biscuit!
If you’ve struggled with making homemade biscuits in the past, then hopefully these tips will help you…
Ingredients for Homemade Buttermilk Biscuits
Fortunately for me and my 45 (exaggerating) attempts at perfecting a cast iron biscuits recipe, you only need a few inexpensive ingredients, most of which you probably already have in your pantry. Here are the biscuit ingredients that you need:
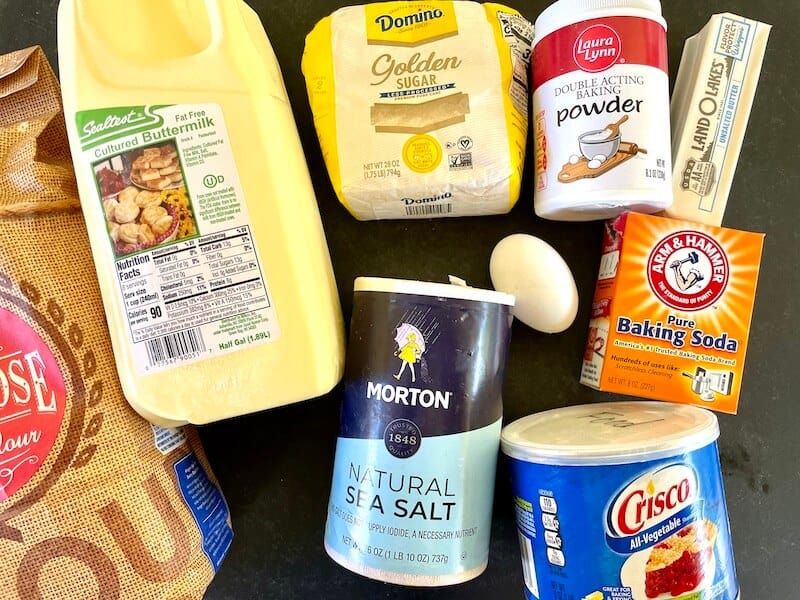
- all purpose flour
- salt
- sugar
- baking powder
- baking soda
- shortening – I used Crisco for my biscuits.
- unsalted butter – I pretty much only use unsalted butter in my cooking, but then I add more salt as needed.
- buttermilk
- egg
Why make your biscuits in a cast iron skillet?
So of all of the cookware in your kitchen, why should you bake your biscuits in a cast iron skillet instead of on a baking sheet or in a glass baking dish? Here are a few reasons why cast iron reigns supreme… instead of just because that’s how grandma used to do it:
Cast iron cookware retains heat.
Cast iron is a great conductor of heat, which is why it’s perfect for searing steaks or baking biscuits. Once the pan gets hot, it retains that heat so your biscuits bake up nice and crispy on the top and bottom instead of soft, doughy, and crumbly.
Higher skillet sides help biscuits rise.
When you think of the best homemade biscuits, you probably think of light and fluffy biscuits… and that means height! If your biscuits are shorter, then they’ll probably also be more dense. But the high sides of a cast iron skillet, in addition to baking powder in the dough and placing your biscuits close to each other, can help the biscuits rise because it gives them something to “climb” up.
When your raw biscuits are touching each other in a tall skillet, they can’t spread out while they bake… they can only bake upwards and rise.
Baking the biscuits in a cast iron skillet helps them to get a nice and crispy bottom.
Since a cast iron skillet retains heat so well, that means that your homemade biscuits will get a nice crispy bottom. If you’re making biscuits for homemade breakfast biscuits loaded with meat and eggs, then you’ll want a crispier biscuit to be able to hold those items. A softer bottomed, crumbly biscuit would probably just disintegrate if you tried to use it for a biscuit breakfast sandwich.
How to Make the Best Cast Iron Skillet Biscuits
You may think that making homemade fluffy biscuits is difficult, but it’s actually pretty easy! Just break down the process into steps that are manageable, focus on getting each step perfect, and you’re well on the way to fluffy buttermilk biscuits that are better than any drive-thru biscuit you can find!
Here are the steps to make the best homemade biscuits in a cast iron skillet:
Step 1: Prepare the dry ingredients for biscuits.
The first step to making the perfect buttermilk biscuits may also be the most intimidating, but it’s actually pretty easy to do!
And funny enough, it’s called “the biscuit method“, which is the name given to the process of blending butter (or a fat of some kind) into flour so that it provides a flaky texture, and then mixing in the wet ingredients to form the dough.
To cut the shortening and butter into the flour, you can use a pastry cutter, but I find that it’s actually easier to do with the back of a fork. You can create the perfect “slivers” of shortening and butter by pressing the larger chunks up against the side of your mixing bowl with the back of your fork. The cold butter and shortening chunks will slide through the prongs of the fork creating little ribbon shapes… and those ribbons of solid shortening and butter help to create the perfect flaky, layered biscuits.
It’s difficult to tell in this photo, but here’s what the process looks like to “cut” the shortening and butter into the flour and other dry ingredients:
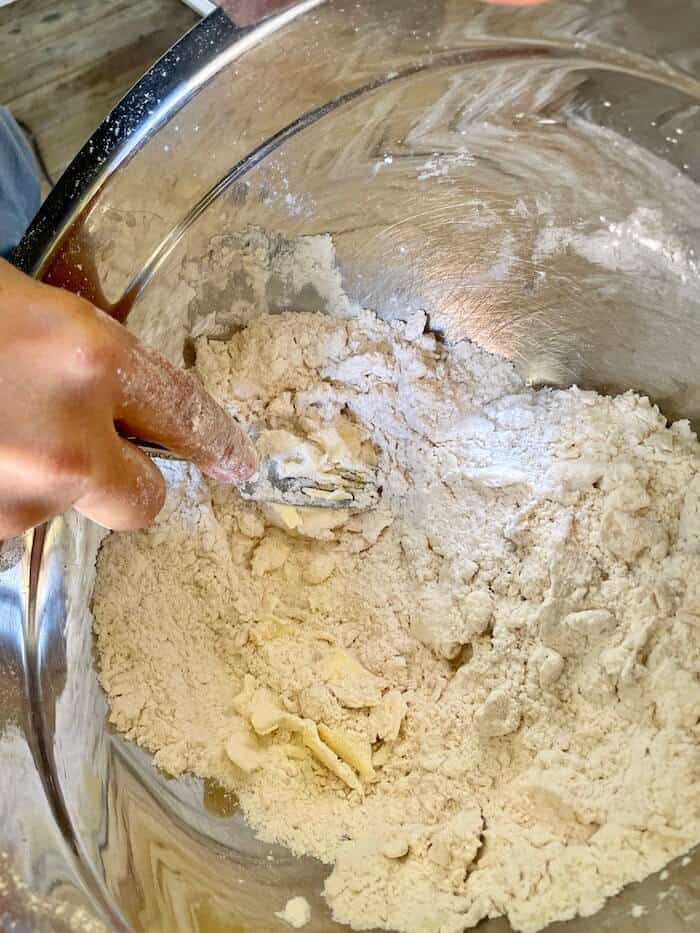
Notice the “ribbons” of butter mixed in with the flour in the bottom left of the bowl? That’s what you want!
Continue to cut in the shortening and butter until you have a good amount of crumbly-looking, pea sized bits mixed in to your dry ingredients.
Step 2: Mix in the wet ingredients to form your biscuit dough.
Once the dry ingredients, shortening, and butter have been gently combined, it’s time to add the wet ingredients to form a dough.
But first, notice the texture and crumb-type consistency of the dry mix? That gives you an idea of what your dry ingredients should look like before adding the buttermilk and egg.

CHEF’S TIP: Beat the egg before adding it to the dry ingredients… You don’t want to overwork the dough, and if your egg is already beaten, you won’t have to do as much mixing.
Add the egg and buttermilk to the dry ingredients and gently mix to form a sticky dough. Only mix the dough just until all of the ingredients are combined… It only took me a few stirs. Your dough will definitely have more of a chunky, crumbly appearance rather than a smooth feel. Don’t over-mix the dough because then your biscuits won’t be as light and fluffy.
Your biscuit dough should look something like this, definitely still wet and sticky:

Step 3: Cut the dough into biscuits and place in the cast iron skillet.
First, make sure that you have a clean dry surface to work on, like a large cutting board or even your kitchen counter. Then, add a dusting of flour to your work surface so that the biscuit dough doesn’t stick to it.
Once your surface is prepared, it’s time to start kneading the dough. Actually, I don’t like the word “knead” to describe this process, because it’s really more of a “folding” method. You’ll need to fold the dough over a few times to form layers in your biscuits.
But before you start folding the dough, you can take a bit of a shortcut to create the biscuit layers… Just take your dough scraper (if you own a griddle, then you probably already have one!), and cut the dough into 4 equal pieces. Stack the 4 pieces on top of each other to form 4 layers, then gently press the layered dough back out into a thinner even layer.
Then you’re ready to “fold” the dough… You can watch my full YouTube video for how to do this, but it’s really pretty easy. Just press the dough out so that it’s in a fairly even layer first, then fold it in half. Press it back out again slightly, then fold it in half again.
Once your dough has been folded about 4 times, just use your fingers to press the dough out into an even layer about 3/4″ thick like this:

Then you’re ready to start cutting the dough into biscuits. Just use a biscuit cutter to press down on the dough like this, just like you would with cookies:
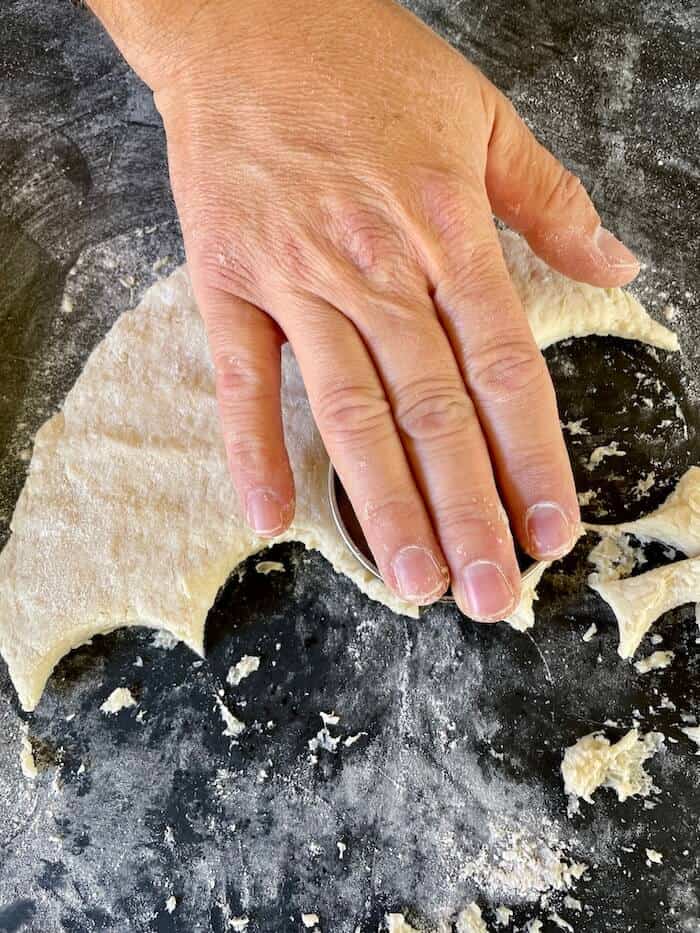
And as you’re cutting the biscuits, add them to your cast iron skillet so that they’re touching each other and the sides of the skillet. Here’s what your cast iron skillet biscuits should look like before going into the preheated oven:

For reference, I’m using a 12″ Lodge Blacklock skillet and my cast iron skillet biscuit recipe below makes 14 biscuits… perfect for the 12″ cast iron skillet.
By the way, if you’re in the market for a new cast iron skillet, you can read my full review of the Lodge Blacklock skillet here!
Step 4: Bake the cast iron biscuits.
Because the cast iron skillet is such a great conductor of heat, your biscuits don’t take very long at all to bake.
I baked my cast iron biscuits in a 425 degree oven for about 12-13 minutes. And here’s the finished homemade buttermilk biscuits in a cast iron skillet:
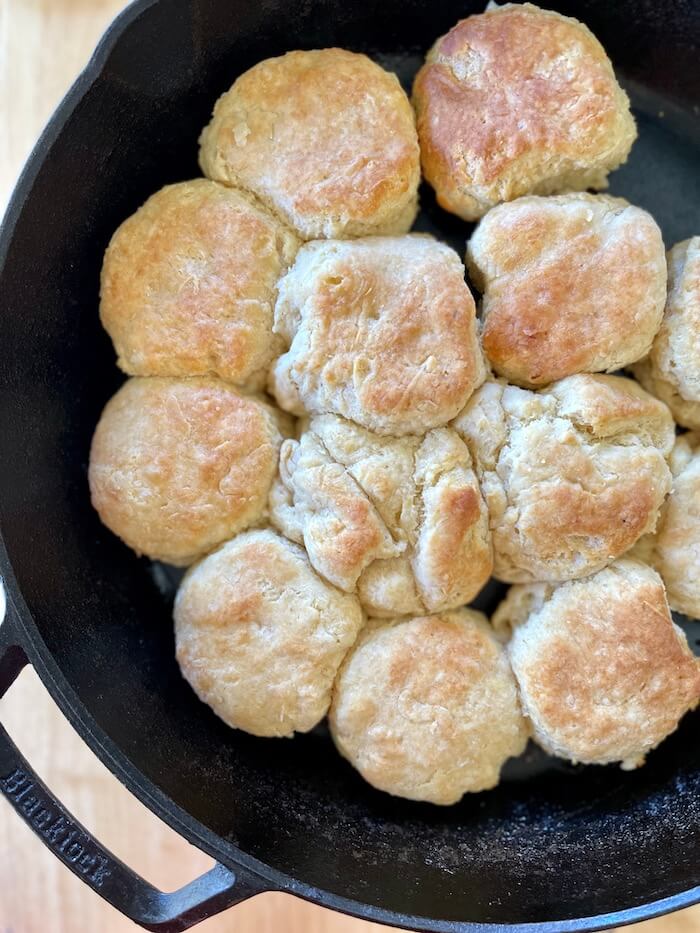
These biscuits were so dang good that even my wife ate a whole one by herself, and she typically doesn’t like biscuits… she would rather save her carb intake for desserts!
Tips for Making Cast Iron Biscuits
Here are some more tips for making the best cast iron biscuits:
Tip 1: Refrigerate the shortening for about 1 hour before starting to make your biscuits.
One of the keys to the best homemade biscuits is good cold fat in the dough, whether it’s butter or shortening or a combination of both. And as you’re cutting the solid fats into the dough, it will naturally get warmer, so be sure that the shortening or butter is extra cold by putting it in the refrigerator first. Otherwise, the shortening or butter that you add will warm up and melt more into the dough, instead of keeping that flaky, ribbon-like texture.
Tip 2: Make sure the biscuits touch each other when you place them in the skillet.
For fluffy biscuits, you want the dough to rise while it’s baking, and placing your biscuits in the pan so that they touch each other slightly is key to this. The more spread out your biscuits are in the pan, the more that they’ll spread out instead of up as they’re cooking.
Tip 3: Check the expiration dates on your baking powder and baking soda.
Since these items don’t get used very frequently, they’re more likely to be expired. If you add expired baking powder or baking soda to your biscuit dough, then your biscuits may not rise properly and they won’t be as light and fluffy.
Want to try another awesome baking recipe for your cast iron skillet? This Cast Iron Skillet Cornbread with Cheese and Green Chiles is one of my favorite things to make, especially on cool fall days when I’m making chili or beef stew! The cornbread mixture fries in the oiled skillet for the perfect crispy crust!

And if your cast iron skillet has seen better days, then check out this post: How to Season a Cast Iron Skillet
Cast Iron Skillet Buttermilk Biscuits
Equipment
- 12" cast iron skillet
- 1 biscuit cutter or round cookie cutter
Ingredients
- 2 cups all purpose flour plus more for kneading dough
- 1 tbsp baking powder
- 1/2 tsp baking soda
- 2 tsps salt
- 2 tsps sugar
- 4 tbsps vegetable shortening (refrigerate for 1 hour before using)
- 4 tbsps unsalted butter very cold
- 1 cup buttermilk
- 1 egg beaten
- 3 tbsp melted butter for brushing on the baked biscuits
Instructions
- Preheat the oven to 425 degrees.
- In a large bowl, whisk together flour, baking powder, baking soda, salt, and sugar.
- Using the back of a fork or a pastry cutter, cut the cold butter and shortening into the dry ingredients until you have flour-covered, pea sized pieces. The mixture should look fairly crumbly at this point.
- Add buttermilk and beaten egg to the bowl and stir gently until just combined. Do not over mix. Dough should be wet and sticky.
- Dust a clean, dry cutting board or your kitchen counter with flour. Turn the dough out onto the floured surface. Sprinkle a bit more flour on to the top of the dough and press the dough into a rectangle. Using a dough scraper, cut the dough into 4 equal sized squares, and stack the squares on top of each other to form layers. Sprinkle a bit more flour on top of the dough if needed, then gently press it out again.
- Fold the dough in half, and gently press it out again. Dust with a bit more flour if needed so that your hands don't stick to the dough. Fold in half again, and press it out again.
- Gently shape the dough into a circle or rectangle shape about 3/4" thick. Use a biscuit cutter or a round cookie cutter to cut the dough into individual biscuits. Add the biscuits to a 12" cast iron skillet so that they are barely touching each other.
- Bake the biscuits at 425 degrees for about 12-15 minutes, or until the tops are lightly golden brown.
- Remove the skillet from the oven and immediately brush the tops of the biscuits with melted butter. Keep biscuits warm until ready to serve.






Comments & Reviews
Jack Brown says
The biscuit sound wonderful
I’m a beginner at making biscuits from scratch so I’ll follow your recipe closely
Don says
Thank You so much I enjoy every video y’all make your creativity is awesome
Neal says
thanks Don