


Nothing beats a good thick steak! Nothing!
While many people won’t bat an eyelash at paying top dollar for a thick juicy steak at a restaurant, they will walk right by an expensive cut in the grocery store without a second glance. Not that I blame them, because when you feel like you can’t properly grill a thick steak without burning it to a crisp or getting it to that perfect med-rare temp, it’s easy to keep on walking.
After all, thick, meaty steaks are expensive, and you wouldn’t just throw $50 bucks on the grill to watch it shrivel up.
The good news is, I got you! No longer will you have to walk by dreaming of what could be when you see a delicious thick ribeye that looks just perfect for the grill. Now you will be able to pile your cart up with confidence knowing you can grill those bad boys to perfection with the forward sear method (sometimes called the sear roast method).
If your goal is to cook thick, juicy steaks on the grill, believe you me, the forward sear is the way to go! It works every single time!
Today, I am going to fill you in on how to get that perfect sear on your steak using the grill and explain why I choose the forward sear vs the reverse sear method when working with thick-cut steaks. While my opinion may not be amongst the most popular, it is pretty much foolproof, and it will give you the best steak… you can bet on it!
What is the Reverse Sear Method?
You’ve probably heard of the reverse sear method for cooking steak as it is the “newer,” more trendy way to cook your meat. But, if you don’t know what it means, reverse searing is essentially cooking your meat until it’s almost done and then cranking up the heat on your grill, broiler, or pan to sear it, so your steak gets that perfect crust as the last step.
The reverse sear has become a new standard in the grilling world, BUT, in my opinion, it really isn’t the best method for grilling a thick steak, and I’ll explain why.
Where did The Reverse Sear Method Originate?
A dash of background for you; the reverse sear style of cooking is based on the French cooking method, sous vide(sounds like- sue-veed). This 50-year-old(+) technique is achieved through heating vacuum-sealed food to a precise temperature in a water bath. Some people feel this type of cooking gives results that cannot be achieved in any other way.
High-end restaurants use the Sous Vide method to cook meat and other food to an exact temperature. This method ensures that the food doesn’t lose volume, is evenly cooked, and retains its moisture content.
As it relates to meat, it is finished off by searing once pulled from the water bath. There are several ways to do this: grilling, pan-frying, or broiling, for example, where you get that caramelized, golden crust that makes meat taste sooo good!
Born from the idea of the Sous Vide method, reverse searing has evolved to slow and low cooking on the grill or in the oven, followed by searing for the delicious brown coating that makes a steak so great.
Is Reverse Searing Better Than Forward Searing?
Well that’s the question, isn’t it? There are some hard-core opinions out there about a reverse sear vs normal sear. Still, you wouldn’t use the same method to cook a potato every time, so it would be nearsighted to make a blanket statement about meat and which grilling method is best in all instances.
It comes down to the three P’s: precision, preference, and palate. When I decided we needed to experience the Snake River Farms American Wagyu Black and Gold Ribeye, my preference was the reverse sear method, and my palate said it was perfection! *You can check out my full Snake River Farms review here!
I know many folks out there prefer the reverse sear vs regular sear, but for certain cuts, the forward sear is the better method, in my opinion. Especially when you have a gorgeous 32 oz thick cut steak, controlling your cooking temperature with precision is important.
What Is The Forward Sear Method? (My Reverse-Reverse Method)
The forward sear method (or my version I call “reverse reverse sear”) is the opposite of the reverse sear. First, you put that nice seared crust on the steak, then move the meat off to the side of the grill, away from the heat until you bring it up to your preferred temperature with low heat and the help of a good meat probe thermometer.
Reverse Sear vs Sear – Which is better for grilling thick steaks?
Like I said, I prefer the forward sear because if you’re cooking a thick steak on the grill, you don’t have to worry about overcooking it the same as when you use the reverse sear where there’s such a small margin for error.
The biggest obstacle with the reverse sear method for cooking a thick steak is overcooking; when you have to put a steak back on the hot grill, you can end up having to sacrifice the perfect crust or run the risk of overcooking your meat to get the golden crust you want.
So what’s the solution for grilling a thick steak perfectly every time? The forward sear!
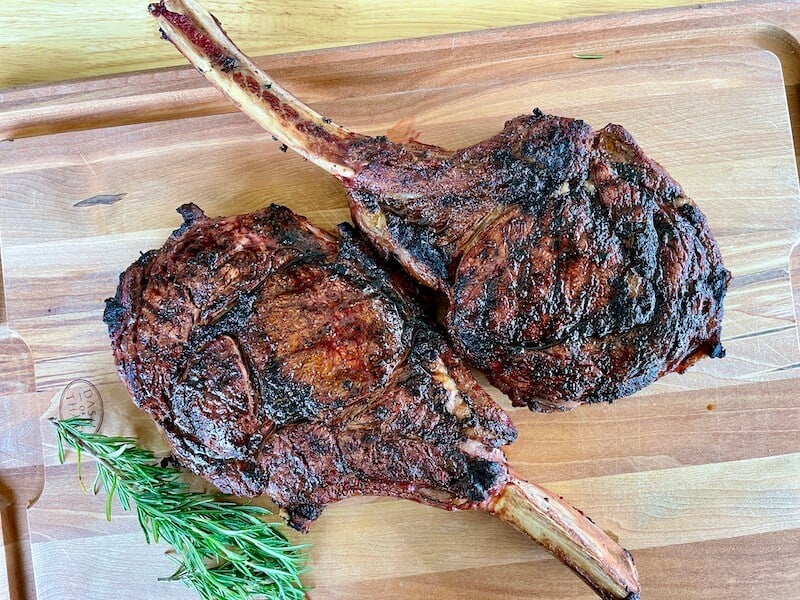
It is better, in my opinion, to start with my preferred reverse-reverse method to get a good sear on a thick steak. From a precision standpoint, this method gives you more control over the final internal temperature of your steak, which is especially important if you’re cooking a thick (and expensive) cut like our Tomahawk ribeyes.
You can always cook a steak up a bit more, but you can never “un-cook” it. I would love for you to try my “reverse-reverse sear,” which will make your tongue do a happy dance. Let your palate be the judge!
How To Grill And Sear A Thick Steak Perfectly Every Time
Tracking the temperature of your steak is THE best way to not over or undercook it to your taste. I mentioned precision earlier, and that’s where the guesswork (ie. wondering if it’s done yet) is taken out of cooking over an open flame. By investing in a good grilling thermometer you know what you’re getting when you pull it off the grill. Even if you have a grill that lets you know the temp inside, I recommend a wireless meat thermometer for grilling so that you can track the internal temp of your meat also.
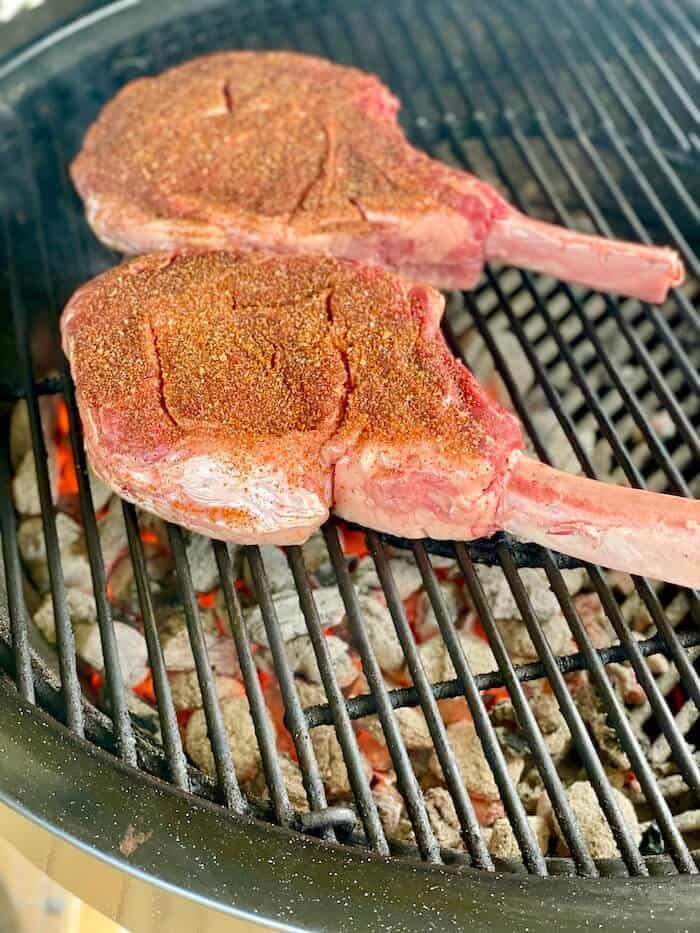
Step 1: Set Up Your Charcoal Grill For The Forward Sear
When you watch my videos, you know I love using my fire starter cubes to get those all-important coals going good and hot for an initial sear.
Since we are using the two-zone method, once ready, all the coals need to be pushed over to one side for the high heat zone, gently sloping towards the center of the grill to create the low heat zone on the other side.
Step 2: Prep Your Thick Steak To Place On The High Heat Zone Of The Grill
After bringing your steaks up to room temp*, pat dry to remove outside moisture so that you get a good crisp sear. Season your steak to your preference, and you’re ready to go.
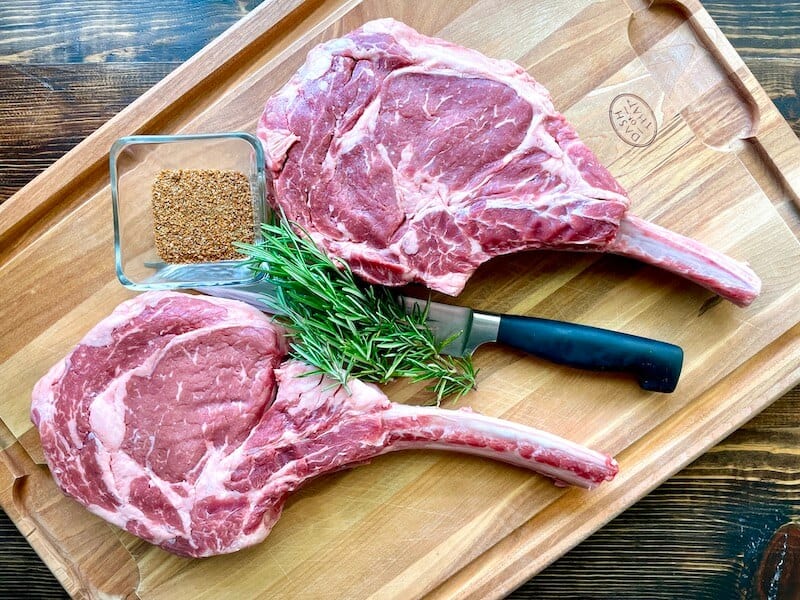
*Throwing a 37-degree steak from a refrigerator vs a room temp steak on a grill definitely impacts the cooking process. So make sure to let the steak come to room temp before you throw it on the grill to sear it.
Step 3: Sear First, Then Move The Steak To The Low Heat Zone
For these awesome Tomahawk babies or any thick steak, put them directly over the high heat zone for 2 minutes, then rotate them 90 degrees for two more minutes; flip and repeat.
Moving the steak 90 degrees gets that beautiful charing pattern that adds to the visual appeal for that “crowning” touch.
Step 4: Lower And Control The Temperature Of Your Grill
Now that you’ve got that perfectly impressive sear, immediately place your steaks on the low heat side of the grill and get the temp down in your grill by closing the dampers.
Here we go… one of many reasons why I rave about the Weber Summit Charcoal Grill is its ability to change temperatures faster than most.
After you get the vents and lid closed, we are aiming for 250 degrees, the same low and slow temp whether it’s beef, chicken, or fish. Once the airflow/oxygen is restricted, the grill temperature will come down, and the meat temperature will come up.
Step 5: How To Finish Off A Thick Steak On The Grill
Okay guys, now we are going to put the wireless probe into the meat and slowly bring up the temperature to your desired doneness. To add that rich, smokey flavor to your steak, toss some wood pieces on the grate or the coals, and shut the lid.
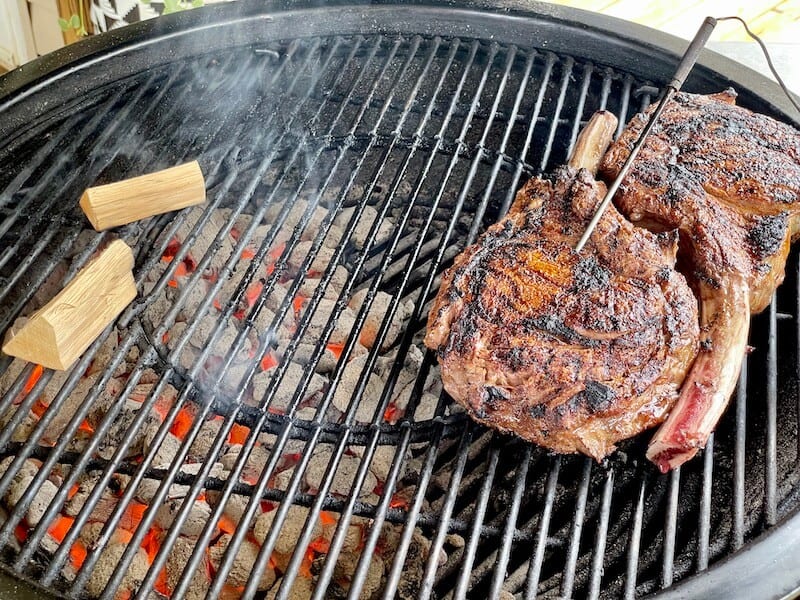
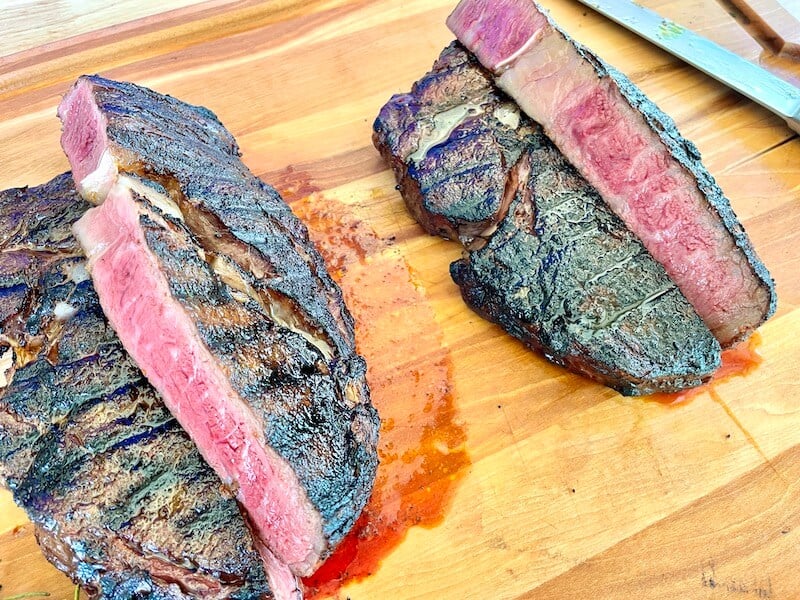
Keep an eye on your probe, adjust the airflow on your dampers to find that 250 sweet spot, and finish off your steaks. You know me and my wife prefer our steaks on the low end of medium-rare, so I pull them off to rest when they hit about 121 to 122 degrees mainly because there is a lot more carry-over heat, which is the exact opposite from when you do the reverse sear vs sear.
Step 6: Let Your Steaks Rest – A Must for Reverse Sear or Regular Sear
Rest is not for the weary! Remember, meat is a muscle, right? So when a steak hits a hot grill, heat causes muscle fibers to constrict, pulling the juices to the center of the meat. If you cut into that meat right off the grill, all those juices flow right out and leave it dry and with less flavor.
Resting that steak on a warm plate or cutting board allows those fibers to relax, letting the juices flow out towards the edges of the meat to evenly distribute all that flavor and goodness.
What To Serve With Your Reverse-reverse Sear Thick Steak
Ok, while those thick steaks are resting, you all know I’ve said many times, you have to find something to do to resist the urge to dive into that perfection that is looking and smelling so awesome. So a couple of options to keep you occupied until you can dig in:
Garlic Rosemary Butter Pan Sauce
On the grill, I make a fantastic little pan sauce for some steaks while they are resting for an extra twist. You can check it out in my Forward Sear YouTube video!
This garlic rosemary pan sauce is so easy to make right on your charcoal grill (might as well since it’s still hot from cooking your steaks!), and it is delicious!
Garden Grilling! I CAN Do Veggies.
Throwing some skewered veggies on the hot zone: onions, peppers, mushrooms, etc., will add a nice touch for any of the less carnivorous eaters in your bunch.
And if you love grilled asparagus with your steaks, but hate when they fall through the grates, try making an asparagus ladder with skewers! Lay 8-10 stalks side by side and run one skewer through the upper stems and another through the lower portion of the stalks. Voila! No more sacrificing veggies to the grill gods.
The Classic Meat and Potatoes
“Man can’t live by meat alone.” (Okay, somebody is lying now, but for this topic, I’ll pretend I agree). Now that we’ve dialed in how to grill a thick steak, you can’t go wrong with a potato side for most people.
If we want something besides just a basic baked potato, we’ll roast our own garlic (it’s super easy!) and make these Easy Garlic Roasted Potatoes. Even my carb-conscious wife loves them.
The Next Time You Have a Giant, Thick Steak to Grill That You Don’t Want To Mess Up, Stick With The “Regular Sear” (Reverse-Reverse)Method!
Although a lot of folks use the reverse sear vs regular sear when grilling thick-cut steaks, I would love for you to try it a different way! Let your palate be the judge of which sear is superior.
Whichever method you choose, know that “we might come together with the same goal, we just got there completely different, and to me, that’s what cooking is all about!”


Excellent article, thank you! Do you ever do steaks on the flattop? Be interested to hear your thoughts and experiences on that!
Glad you enjoyed it… this is my go-to method for grilling steaks!