


Want to learn where the griddle hot spots are on your new flat top grill? My easy bread test can help you visualize your different griddle temperature zones in less than 15 minutes!
One of the biggest challenges that most new griddle owners face is figuring out the temperatures of their griddle surface. If you’re not used to griddle cooking, there can be a bit of a learning curve in the early days as you figure out why your eggs are burning on one area of the griddle, but your bacon is still raw after cooking on the corner of the griddle for 15 minutes.
Just like when you get a new car, it may take a few miles to figure out how much pressure you need to apply to the gas to start out on a hill, or how sensitive the brake pedal is. The same thing goes with griddle cooking.
But fortunately, there’s a “test” that you can do to visualize the temperature zones on your griddle and make that learning curve a little less steep.
The “Biscuit Test” has been popularized by many grill and smoker owners to find the hot spots on their grills and barbecue pits, so I decided to develop a similar “Bread Test” using slices of white loaf bread. My bread test, or “toast test” is a practical method that is now used by many griddle cooking enthusiasts to identify hot spots on their griddle surface. It’s a straightforward and effective way to learn about the heating capabilities of your new griddle, and it will only cost you a few loaves of bread and a bit of propane.
Here’s how to test the temperatures across your griddle with a loaf of bread, and how to interpret the results:
What “The Bread Test” Tells You About Your New Griddle
Most griddle beginners have the same question – What temperature should I cook (insert griddle food name here) at? Either people want to know what temperature setting to use for griddle eggs or smash burgers, you name it.
But if I told you to cook your scrambled eggs at 300 degrees F and you turn all of your burners to low, then your griddle could easily get to 400 degrees F, depending on which griddle brand that you have. So in that case, you would probably want to know where the cooler areas are on your griddle surface and cook your eggs in that zone.
Or you would need to cook your eggs as the griddle is preheating, or turn off the heat and cook them as it’s cooling down… but that’s another post about griddle temperatures.
Think of the bread test as your thermal imaging device or heat sensor goggles. The color of the toast when you complete the test tells you where you can expect for your food to cook quickly or possibly burn on the griddle surface, and where you can move your fried rice or stir fry vegetables to keep them warm but not overcook while other food items are finishing up.
How to Find the Griddle Hot Spots on Your Flat Top Grill
Here’s how you can perform the “bread test” on your new griddle to learn more about the temperature zones:
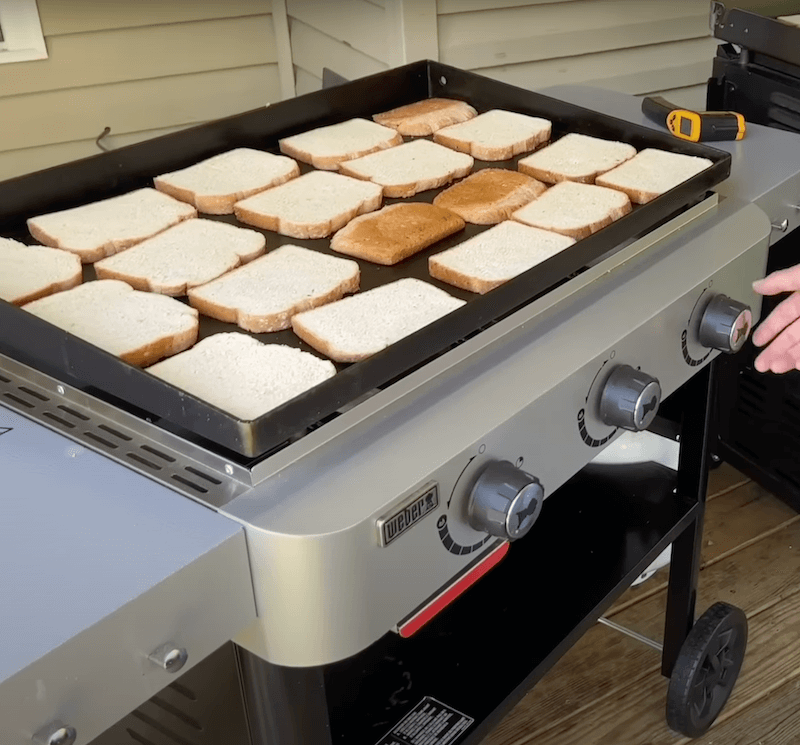
- Place sliced bread all over the griddle surface, end to end. If you want a true visual of the hot zones, don’t use the end pieces of the bread loaf, because they probably won’t lay flat on the surface, so you won’t have an accurate representation of the griddle temp in that area. And be sure to use plain white bread so that you can easily see the color difference in the different slices. Wheat bread is already brown, so it will be more difficult to visualize the toasting patterns.
- Turn the griddle on and toast the bread. Once the bread is in an even layer laid out across the surface, turn the griddle on. I usually like to turn all of the knobs on to low, and allow the surface to heat for about 10-15 minutes (the typical griddle preheating time) with the bread on there. Don’t touch the bread during this time.
- Turn the bread over. At the end of 10-15 minutes, carefully turn the bread over.
- Take note of the griddle hot spots. The spots where the bread toasts more quickly are your griddle’s hot spots. These areas tend to be hotter than the rest of the cooking surface. Also, if your bread is very dark or burnt, then your griddle may not need as long to preheat.
Interpreting the Results from the Griddle Bread Test
First off, my toast test isn’t intended to have a pass or fail result. All griddles will heat differently and have different hot and cool spots based on brand, so the point of the test is to give you a visual representation of the griddle temperature zones.
Let’s look at a few different griddles to see what we can learn from this test:
*NOTE – All of the griddle tests below were done on the same day (same outdoor temperature), with the same type of bread. I turned all of the griddles on to the lowest heat setting, and allowed the griddles to heat for the same amount of time before turning the toast over.
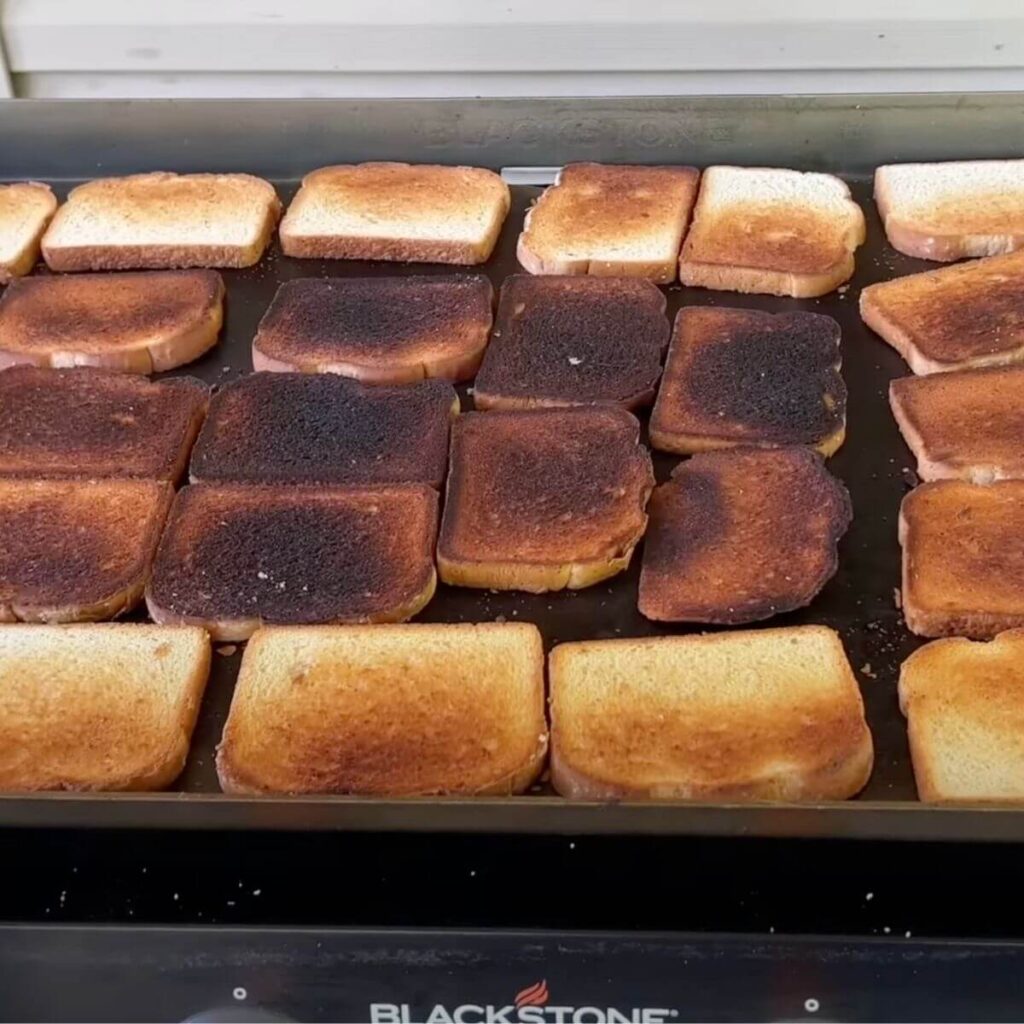
Blackstone Culinary Series Griddle with Omnivore Top
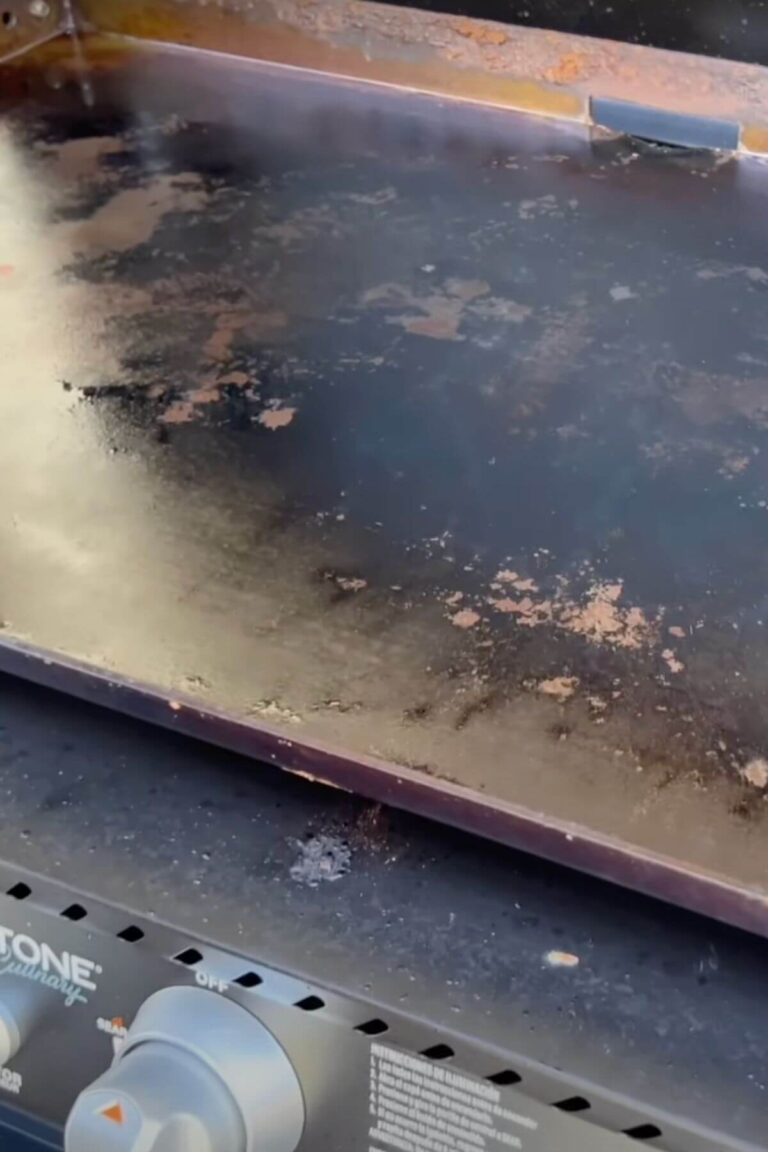
In my experience with four different Blackstone models, most Blackstone griddles will have a result similar to the photo below:
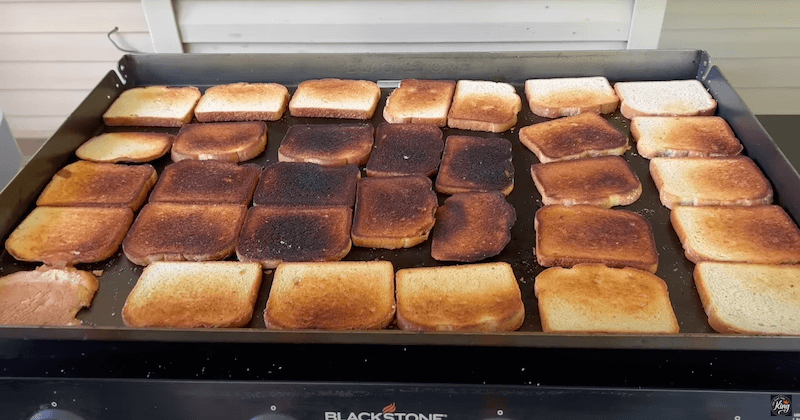
If your toast looks like this, with burnt pieces in the middle and lightly toasted pieces on the outside edges, you don’t have a bad griddle. In fact, you can use that to your advantage. Use the outer areas of the griddle as a “warming” zone to keep the food warm while the rest of your meal finishes cooking.
Also, the darker bread in the middle indicates that the center will get hotter, so use that area to sear griddle steaks or get a nice crust on your chicken breasts. The burnt pieces of bread also tell you that you may not need to preheat your griddle as long before starting to cook, or you may need to alternate burners with some burners turned off completely to get low temperatures across the surface.
Weber Griddle
Some griddles (like the Weber griddle pictured below) will have lighter toast colors across the board, indicating that the griddle temperature stays in the lower range. This tells us that we may need to use the higher heat settings more frequently for cooking stir fry recipes or proteins where we want a good sear, since this griddle naturally doesn’t run as hot.
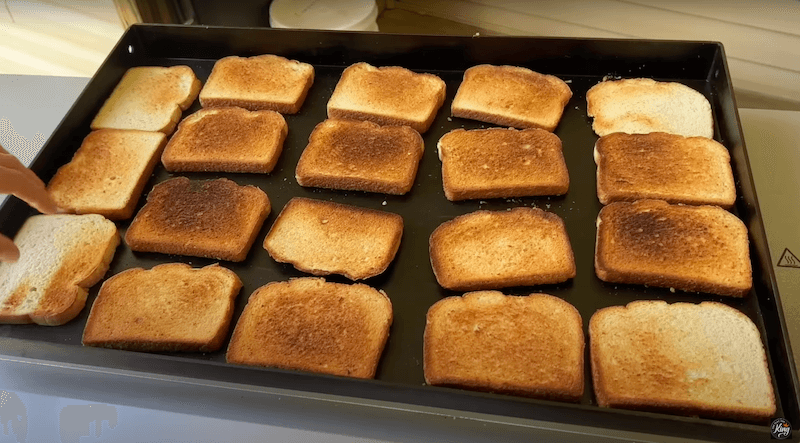
Traeger Flat Rock Griddle
The Traeger Flat Rock griddle has the most even heat distribution compared to all other griddle brands that I have used. This is evidenced by the colors of the toast below.
You’ll also notice that the toast is generally darker in color than the Weber griddle above, which tells us that this griddle’s low heat setting runs a bit hotter than the Weber griddle, but the heat distribution is pretty much even edge to edge.

Therefore, if you want to create a cooler zone with the Traeger griddle, then you would need to turn one burner completely off, or use a wire rack to elevate the food above the surface to keep it warm – like with bacon, sausage, or pancakes that are already done cooking.
Overall, my bread test is a very simple way to learn your new griddle, and I highly recommend that you take the 15 extra minutes to familiarize yourself with your griddle temperatures before you start griddle cooking. This straightforward test will help prevent overcooking or undercooking on your griddle, and you’ll get a jump start on learning your griddle capabilities so that you’ll be making perfect smash burgers and fluffy golden brown pancakes in no time!


Get More Griddle Recipes!
Follow The Flat Top King on YouTube for more recipes and tips for mastering your griddle!