


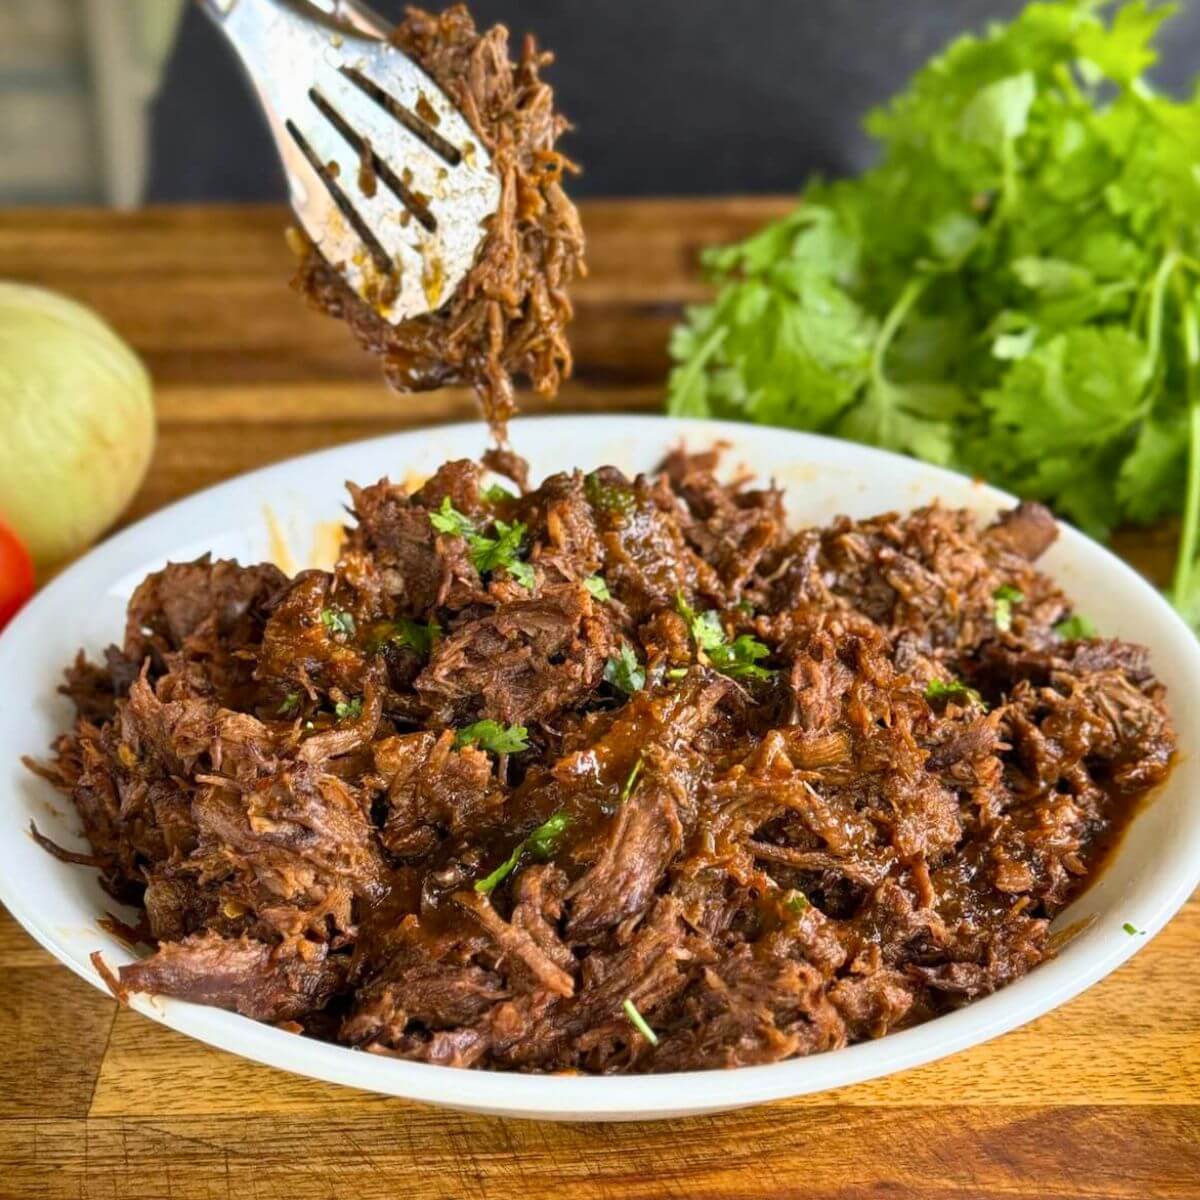
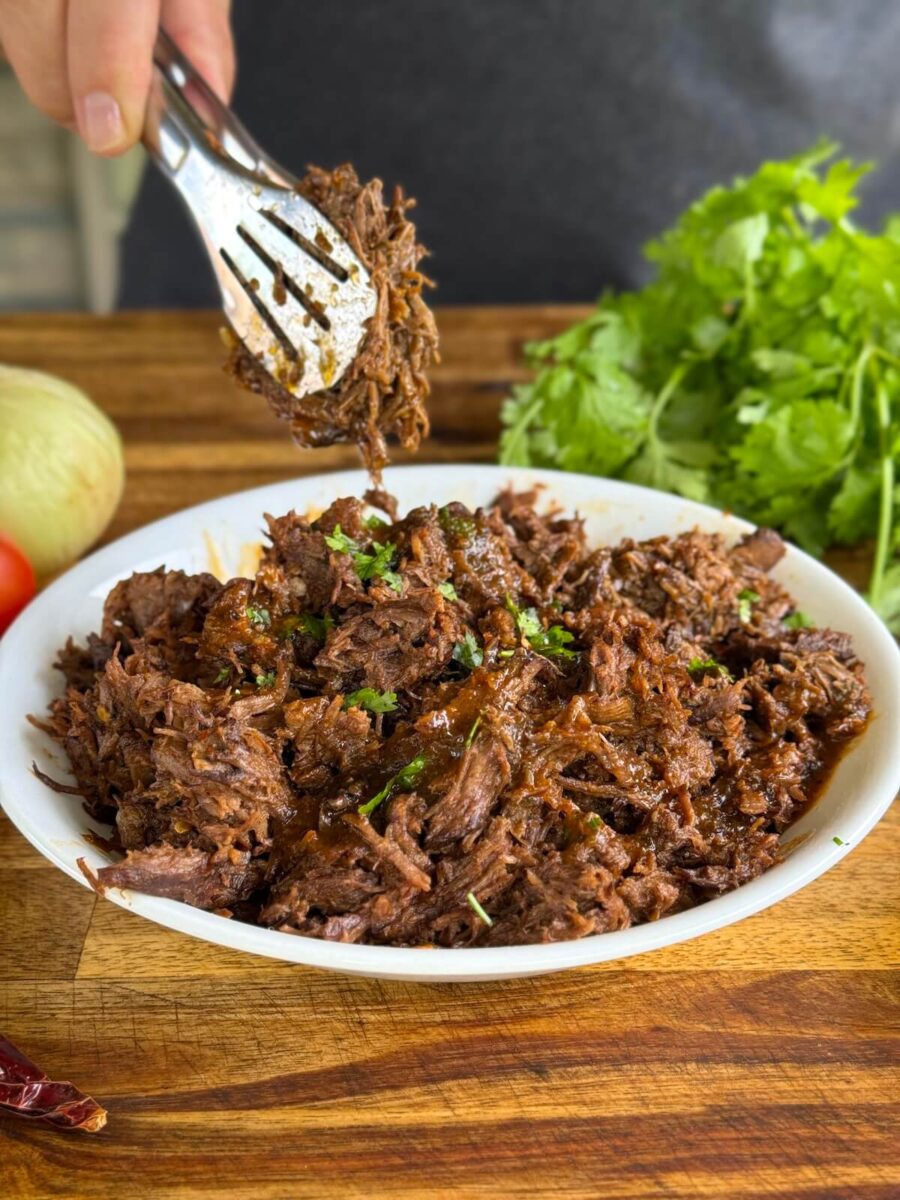
This is our tried and true beef birria recipe, made with chuck roast and beef back ribs for the extra fat and major beefy flavor. Dried chile peppers, beef stock, and a blend of earthy spices combine to make a rich, deeply flavored birria sauce for fall apart tender beef that’s perfect for tacos, burritos, nachos, and more!
If you’ve had birria at a restaurant and walked away feeling underwhelmed — you’re not alone. I’ve had birria queso tacos all over the country, and time after time, the same two complaints come up: the flavors are flat, and the tortillas are soggy. That’s exactly why I set out to develop a birria recipe that actually delivers on every promise this dish is supposed to make.
This is not a traditional Mexican grandmother’s birria — and I’ll be upfront about that. This is my take on an iconic dish, built from real testing, honest tasting, and a serious respect for bold beef flavor. After multiple rounds of development, tweaking the pepper balance, dialing in the fat, and perfecting the sear technique, I’m confident this is the best beef birria you’ll make at home.
The birria is made from a combination of chuck roast and beef back ribs and braised low and slow in a stock pot in a homemade Mexican-style sauce. The result is beef that’s fall-apart tender with deep, complex flavor in every bite.

What Makes My Birria Recipe Unique?
Most birria recipes lean on beef chuck roast alone – and while chuck is a great braising cut, it’s missing one critical element that is essential for making modern birria tacos: fat. Fat is what floats to the top of the consommé, what you dip your tortillas in, and what gives birria tacos their signature crispy, flavorful exterior. Without enough fat, you get a watery dip and a soggy tortilla.
Here’s what I do differently:
Beef Back Ribs as a Secret Weapon
Instead of reaching for expensive beef short ribs or oxtail (which can run nearly $19 a pound), I use beef back ribs at a fraction of the cost – around $5.49 a pound. Here’s why this matters:
- Major fat content: Back ribs carry a significant amount of fat that renders out during roasting and braising, giving you a rich, fatty broth that is absolutely essential for dipping tortillas.
- Incredible beef flavor: The bones contribute a deep, rich, marrow-forward beef flavor that you simply cannot get from chuck roast alone.
- Budget-friendly: You get the flavor impact of premium cuts at a much lower price per pound.
High-Heat Roasting Before Braising
Before anything goes into the pot, the beef back ribs go into the oven at 475°F. This high-heat roast drives serious caramelization and browning on the exterior – that Maillard reaction layering in flavor that slow braising alone can never replicate.
Fat Separation for a Clean Consommé
Once the birria is done, the fat is skimmed from the top of the consommé and kept separate. This gives you pure, concentrated beef fat for tortilla dipping — without making the sauce itself greasy. The result is a delicious broth you can also use as a rich, reduced sauce — a layering of flavors that most restaurant versions never bother with.
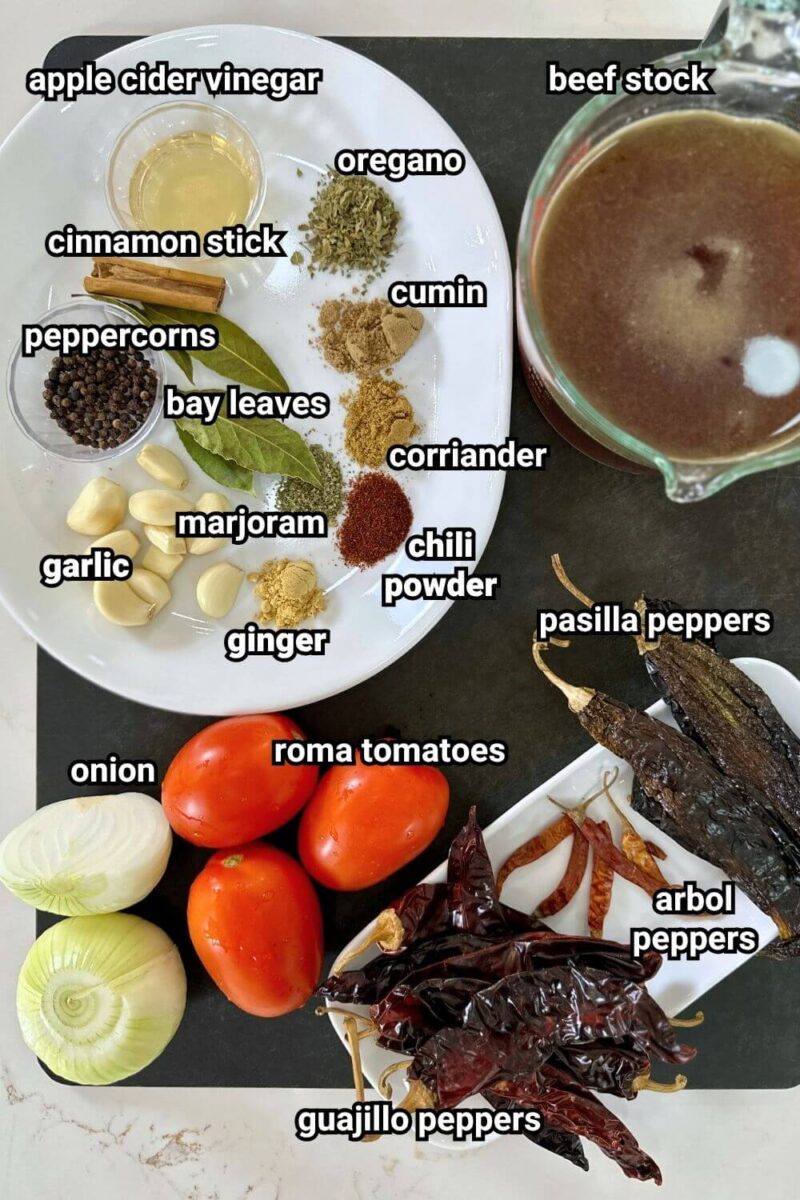
Ingredient Notes
- Beef Chuck Roast: Cut into large chunks before searing. More pieces mean more surface area, which means more caramelization and flavor. Don’t cut it too small – you want substantial chunks that hold together through the braise.
- Beef Back Ribs: The unsung hero of this recipe. Back ribs are the rib bones left after a butcher cuts the ribeye off the rack. They carry a good amount of meat and a lot of fat. If the rack is too large for your pot, have your butcher cut it down.
- Dried Guajillo Peppers: The backbone of the chile flavor. Earthy, slightly tangy, with mild heat. These are the most commonly used chile in birria.
- Dried Pasilla Peppers: Deep, dark, raisin-like flavor with moderate heat. They add complexity and body to the consommé.
- Dried Arbol Peppers: These bring the heat. Adjust the quantity up or down based on your spice tolerance.
- Mexican Oregano: This is different from Mediterranean oregano – it’s more citrusy and pungent. Don’t substitute regular oregano if you can avoid it.
- Mexican Cinnamon Stick: Also called Ceylon cinnamon, this is softer and more floral than the common Cassia cinnamon. It’s a key background note in birria.
- Beef Tallow: If you render fat from your beef ribs or save brisket trimmings, use that here. It keeps the flavor profile purely beef-forward. Oil works fine if you don’t have tallow.
- Roma Tomatoes: Use these in moderation. Too many tomatoes will push the consommé in a tomato-forward direction and pull it away from that deep beef flavor you’re after. Three is the sweet spot for this recipe.
*Tip on dried chiles: Don’t be intimidated by dried peppers. They’re cheap, they last a long time on the shelf, and they are the single biggest driver of authentic birria flavor. Buy a variety and keep them on hand. They’re also great for stewing, blending, and adding to a pot of chili.
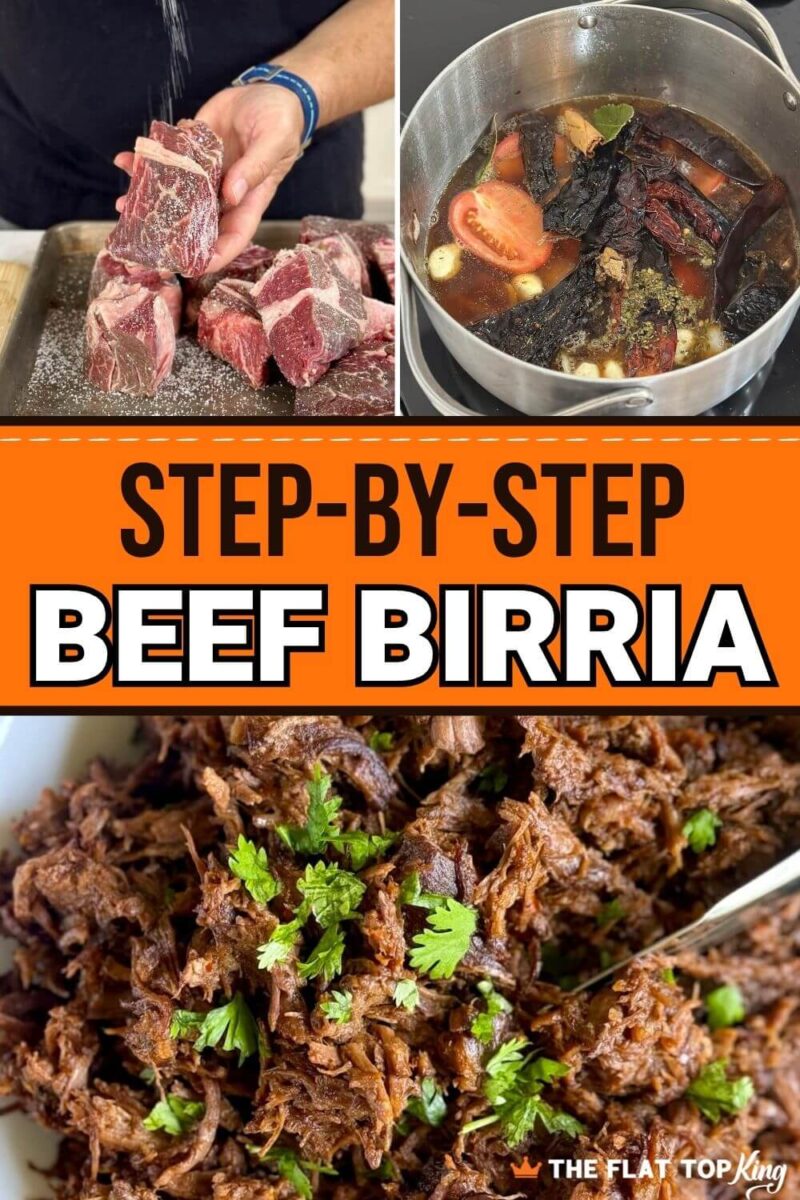
How to Make Beef Birria – Step by Step Guide
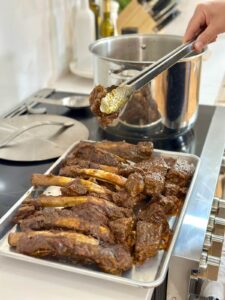
Step 1: Roast the Beef Back Ribs
Preheat your oven to 475°F. Season the beef back ribs lightly with kosher salt – don’t overdo it, since the braise will concentrate flavors. Roast on a sheet pan for about 15-20 minutes, finishing under the broiler for 5-10 minutes to get a deep, dark caramelization on the exterior. You’re looking for serious browning — that’s all flavor. Remove from the oven and let them rest while you prep everything else.
Step 2: Prepare the Dried Chiles
Stem and seed the dried guajillo, pasilla, and arbol peppers. Then toast the peppers in a dry pot over medium heat for 2–3 minutes, just until fragrant. Watch them closely – they can scorch quickly. Remove and set aside.
Step 3: Char the Aromatics

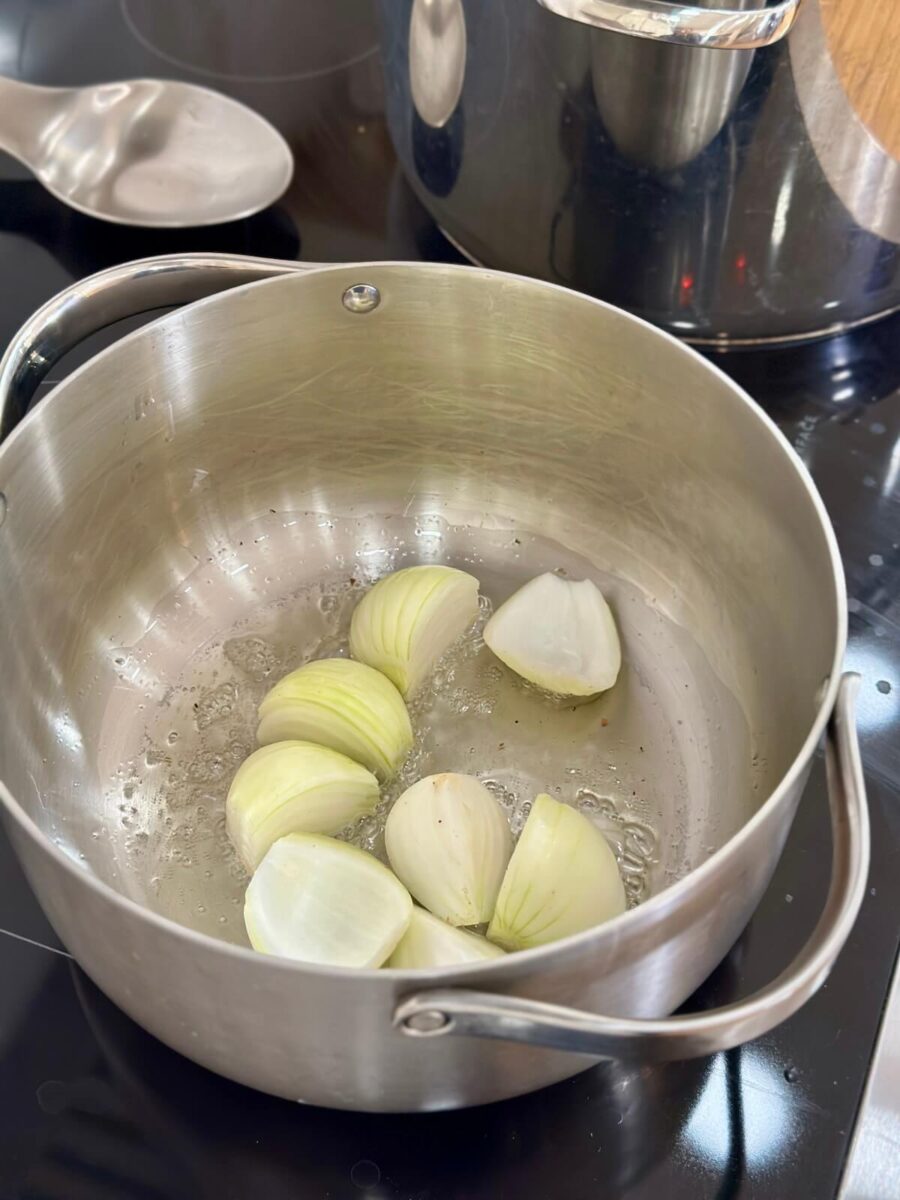
In the same dry pot, cook the quartered onion in a bit of beef tallow over medium-high heat until charred and softened, about 5–8 minutes. You want real color here. When the onions have about 2 minutes left, add the garlic cloves to the pot to get fragrant. This char adds a subtle roasted depth to the consommé.
Step 4: Sear the Chuck Roast
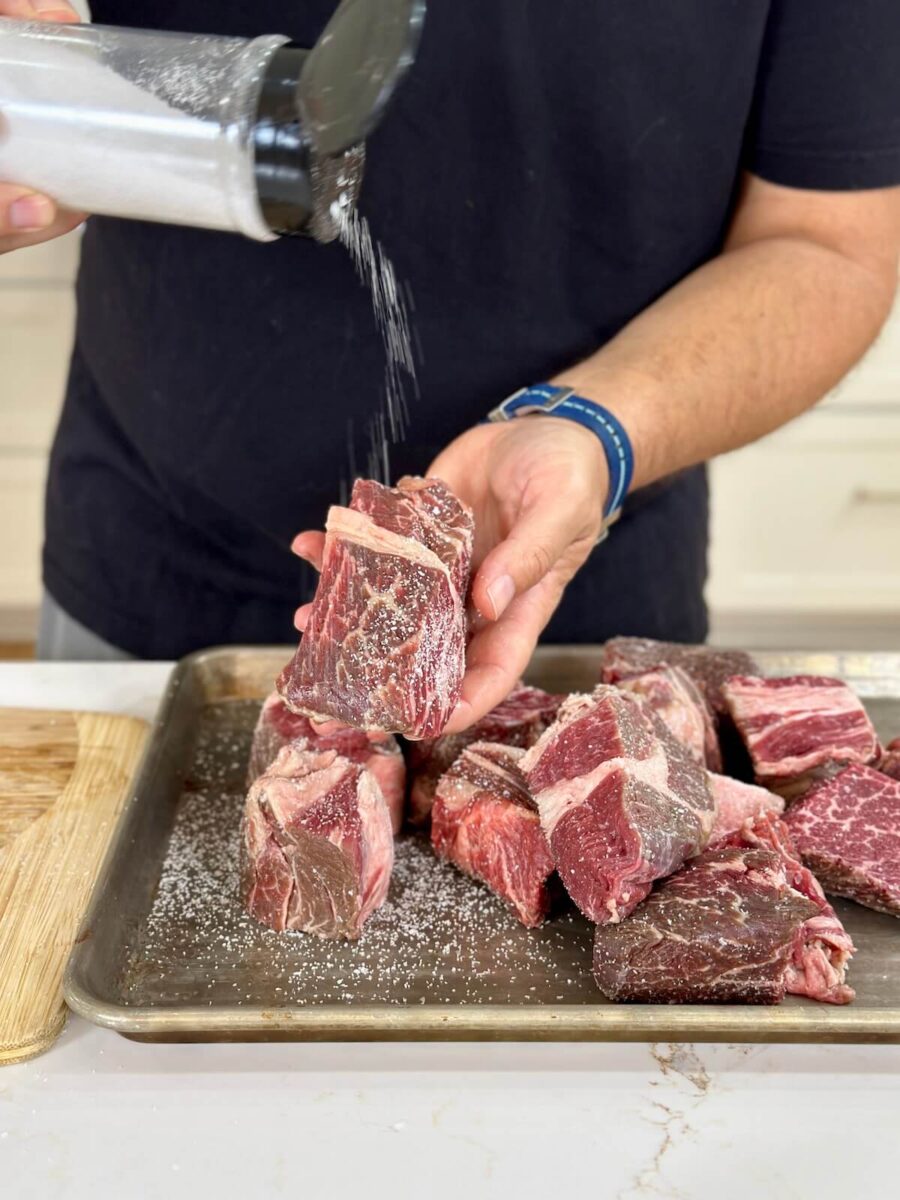

Cut your chuck roast into large chunks and season lightly with salt. Heat 2 tablespoons of beef tallow (or oil) in a large stock pot over medium-high heat. Working in batches so you don’t overcrowd the pan, sear the chuck roast chunks on all sides until deeply browned. Don’t clean the pot — all that fond on the bottom is flavor.
Step 5: Steep the Chile Sauce

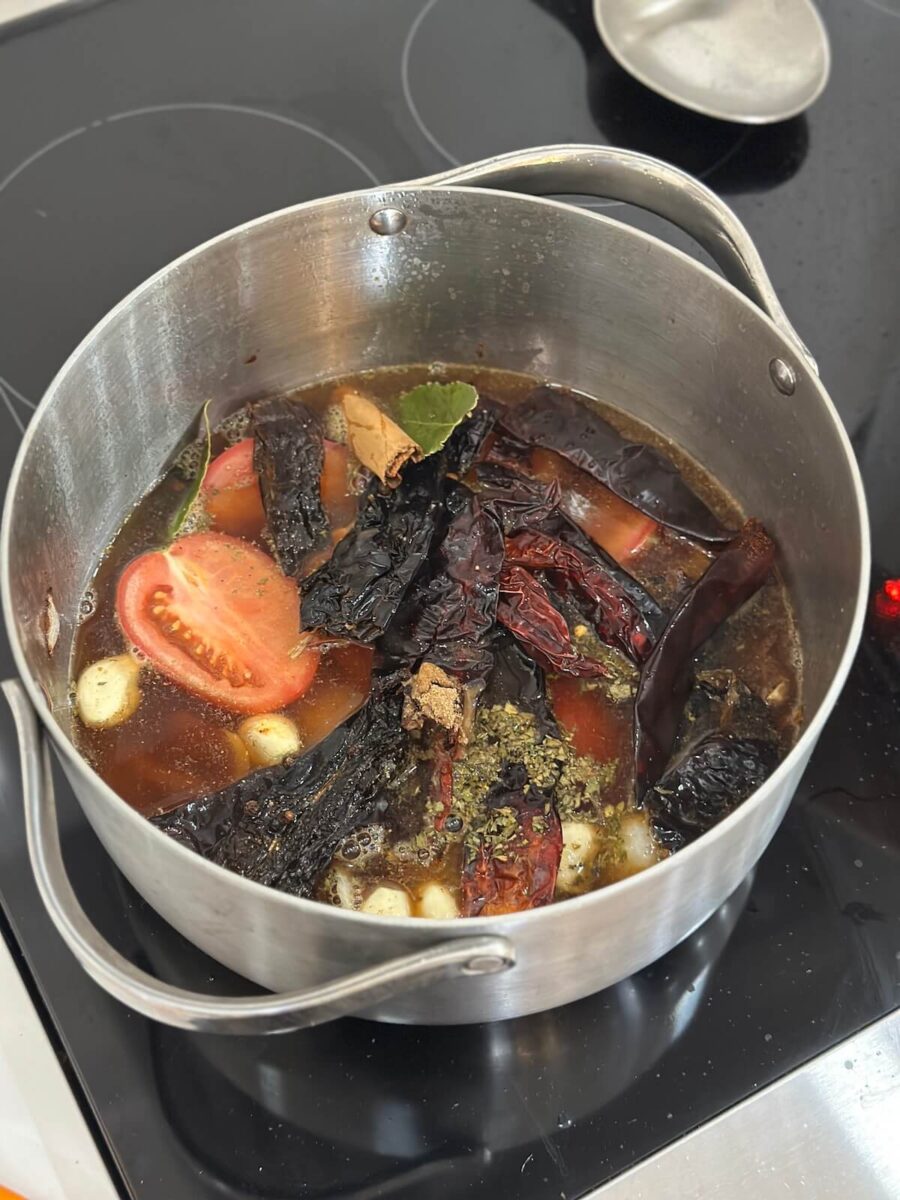
Add the toasted chiles to the pot along with the charred onion and garlic. Then add the roma tomatoes, cinnamon stick, bay leaves, black peppercorns, all the dried spices, and the apple cider vinegar. Pour in the 4 cups of beef stock. Bring to a boil, then cover, turn off the heat, and let everything steep for 15–20 minutes. The goal is soft, fully hydrated chiles.
Step 6: Blend the Chile Sauce
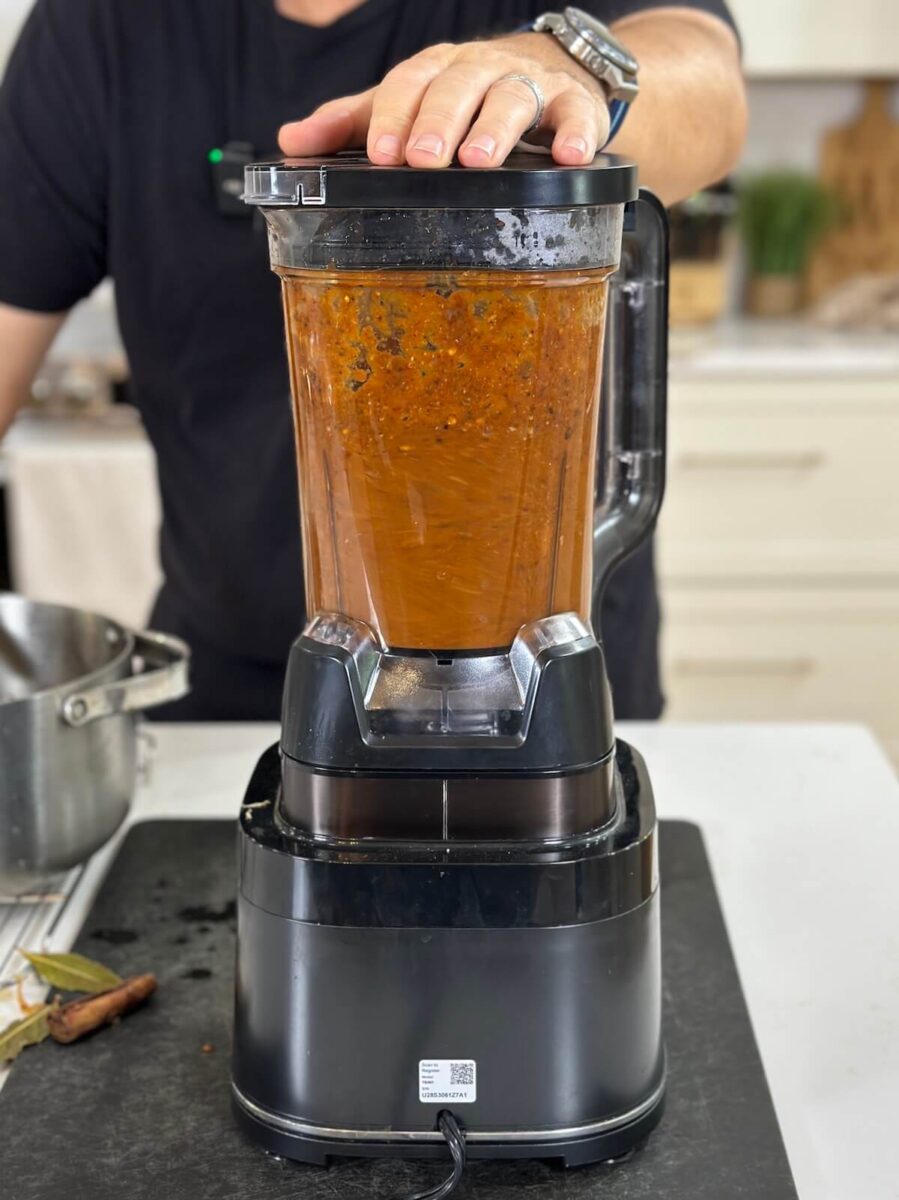
Remove the bay leaves and cinnamon stick before blending. Carefully transfer the chiles and liquid to a blender in batches – it’s hot, so vent the lid and be careful. The hot liquid will expand as it blends. Blend until completely smooth.
Step 7: Braise the Beef
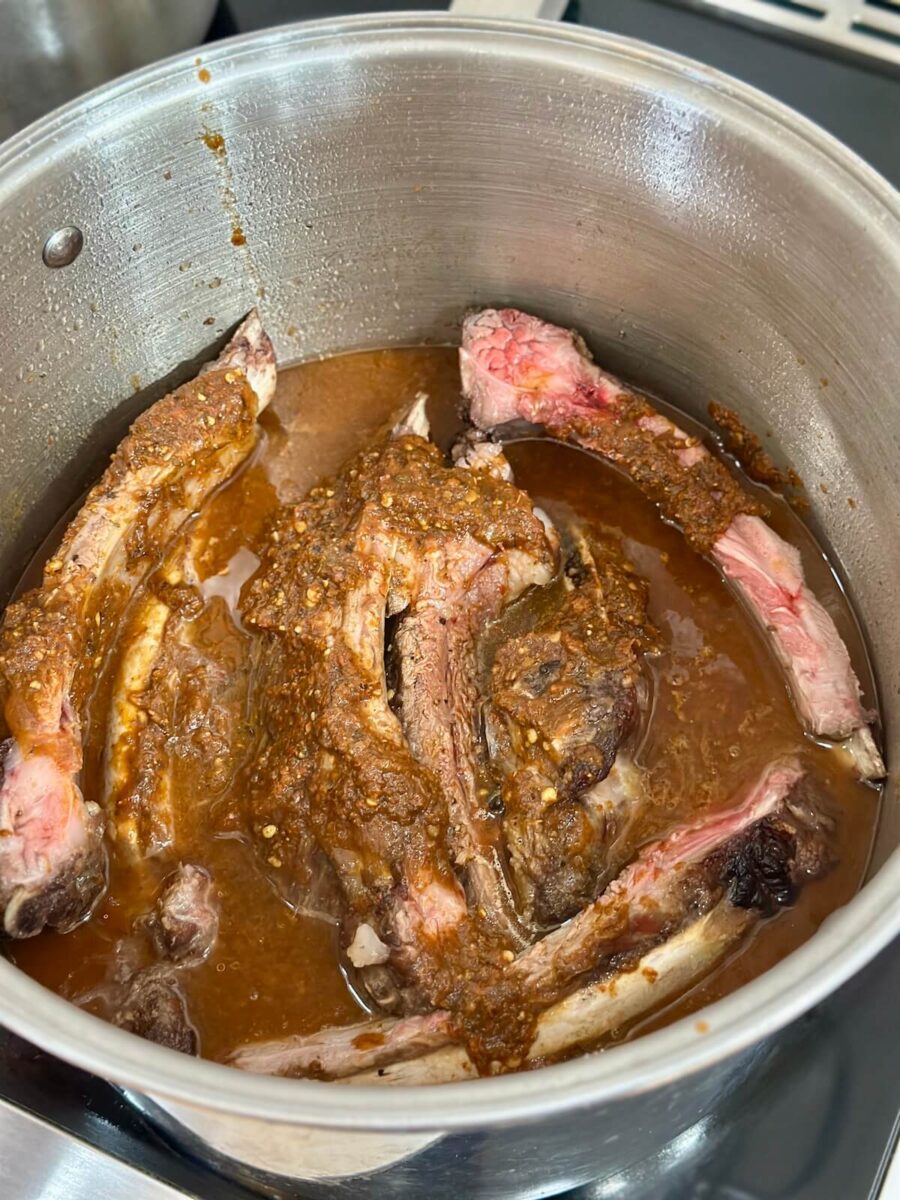
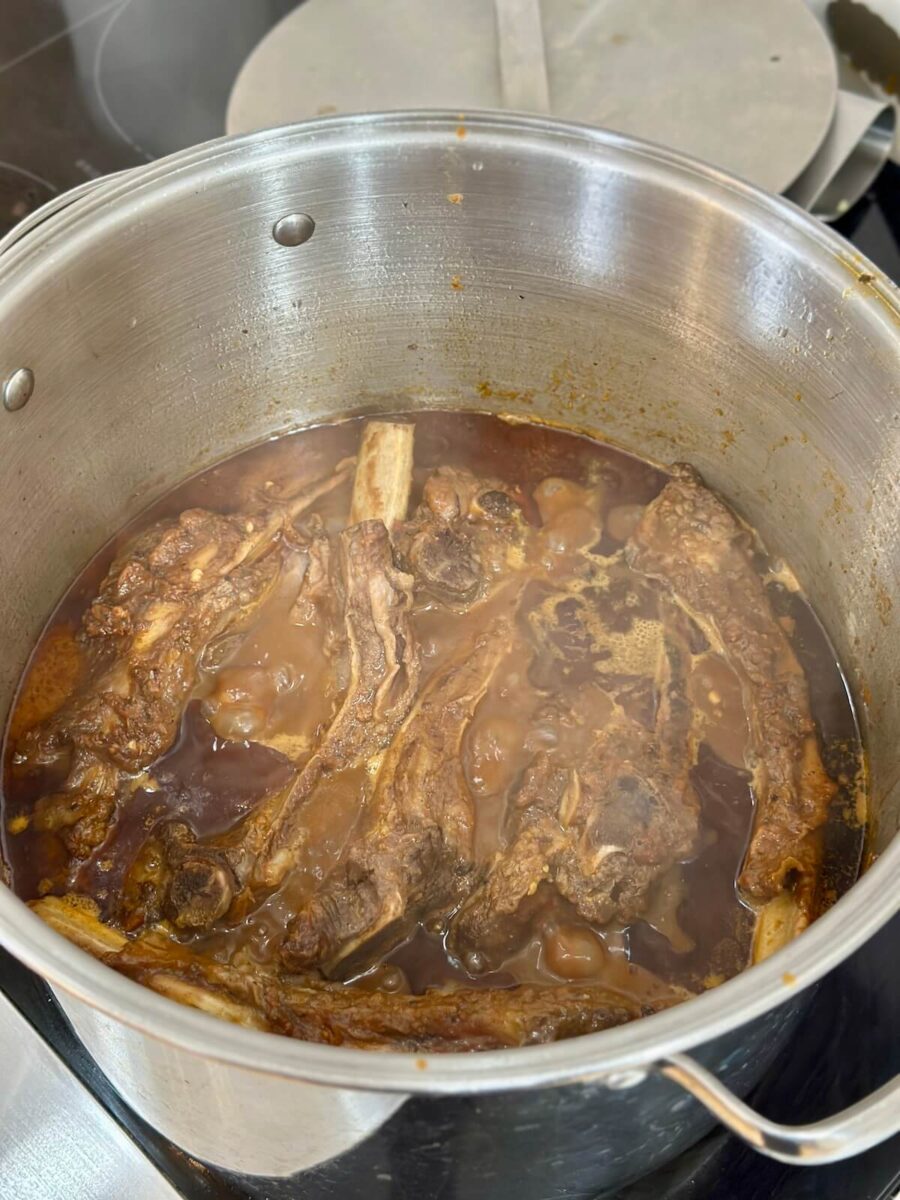
Cut the rack of beef ribs into individual ribs, and add to the pot with the seared chuck roast chunks. Pour in the blended chile sauce. Add water to the pot until the beef is just barely covered, about 2 cups. Bring to a boil, then reduce heat to a low simmer. Braise covered for 2.5 to 3 hours, or until the chuck roast is completely pull-apart tender and the rib meat is falling off the bone. The chuck may be done before the ribs – check both independently and remove the beef as needed to rest.
Step 8: Rest, Shred, and Skim
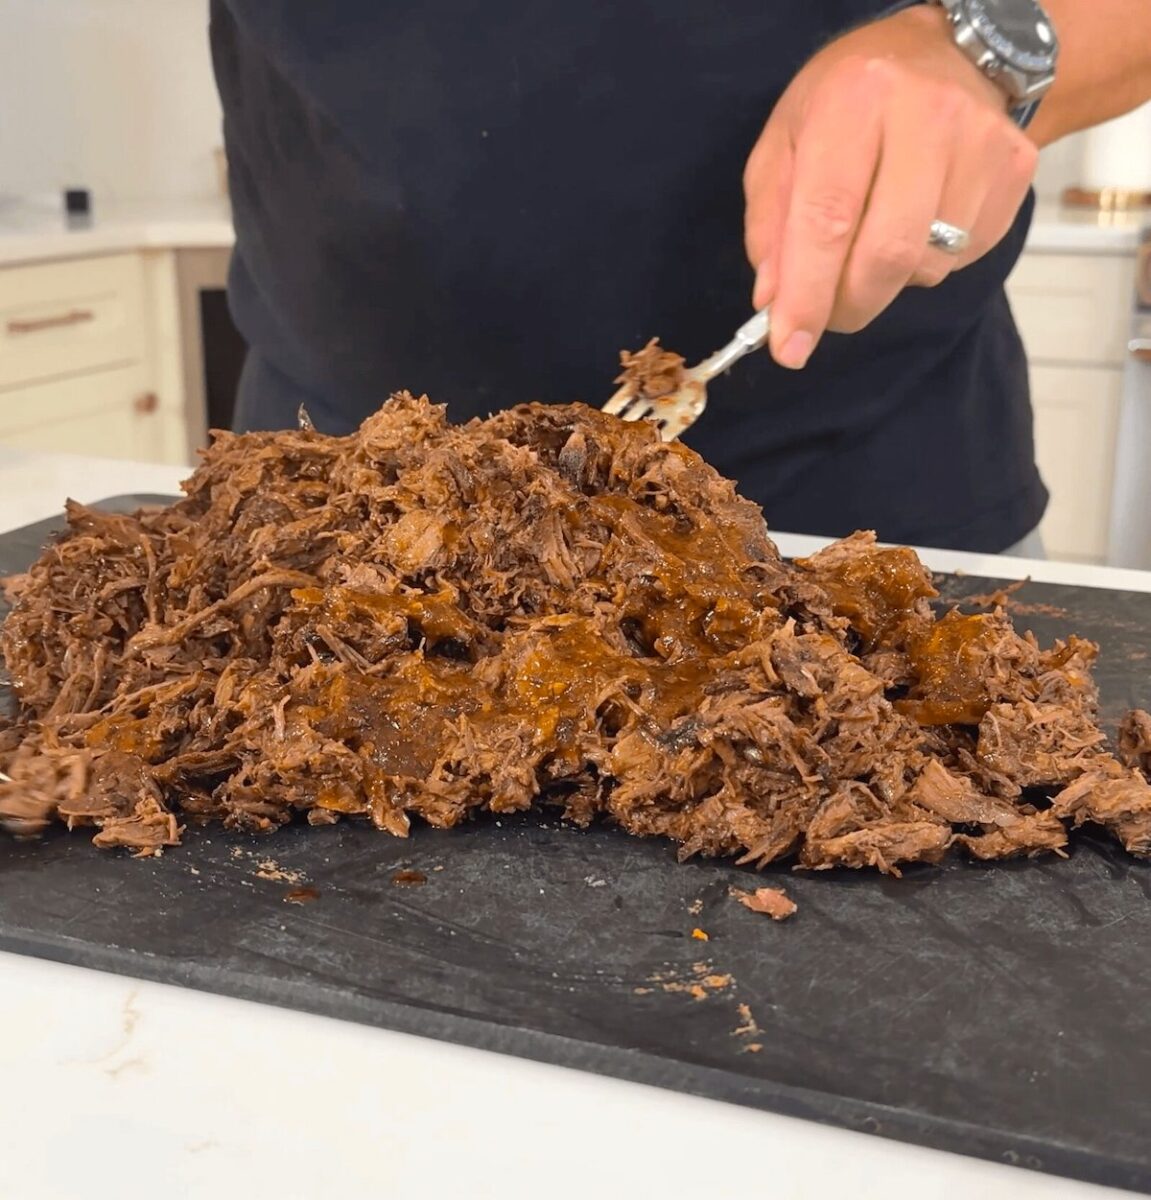
Remove the beef from the pot and let it rest for 10–15 minutes. Pull the chuck roast apart into large shreds. Pull the rib meat off the bones and remove any silver skin you find. Combine all the shredded meat in a large bowl.
Meanwhile, transfer all of the braising liquid to a large bowl. Allow to cool for several minutes for the fat to rise to the top. Then skim the fat from the top of the consommé using a ladle, fat separator, or skimmer. Reserve this fat separately — it’s pure concentrated beef fat and is essential for dipping tortillas.
Step 9: Finish the Consommé
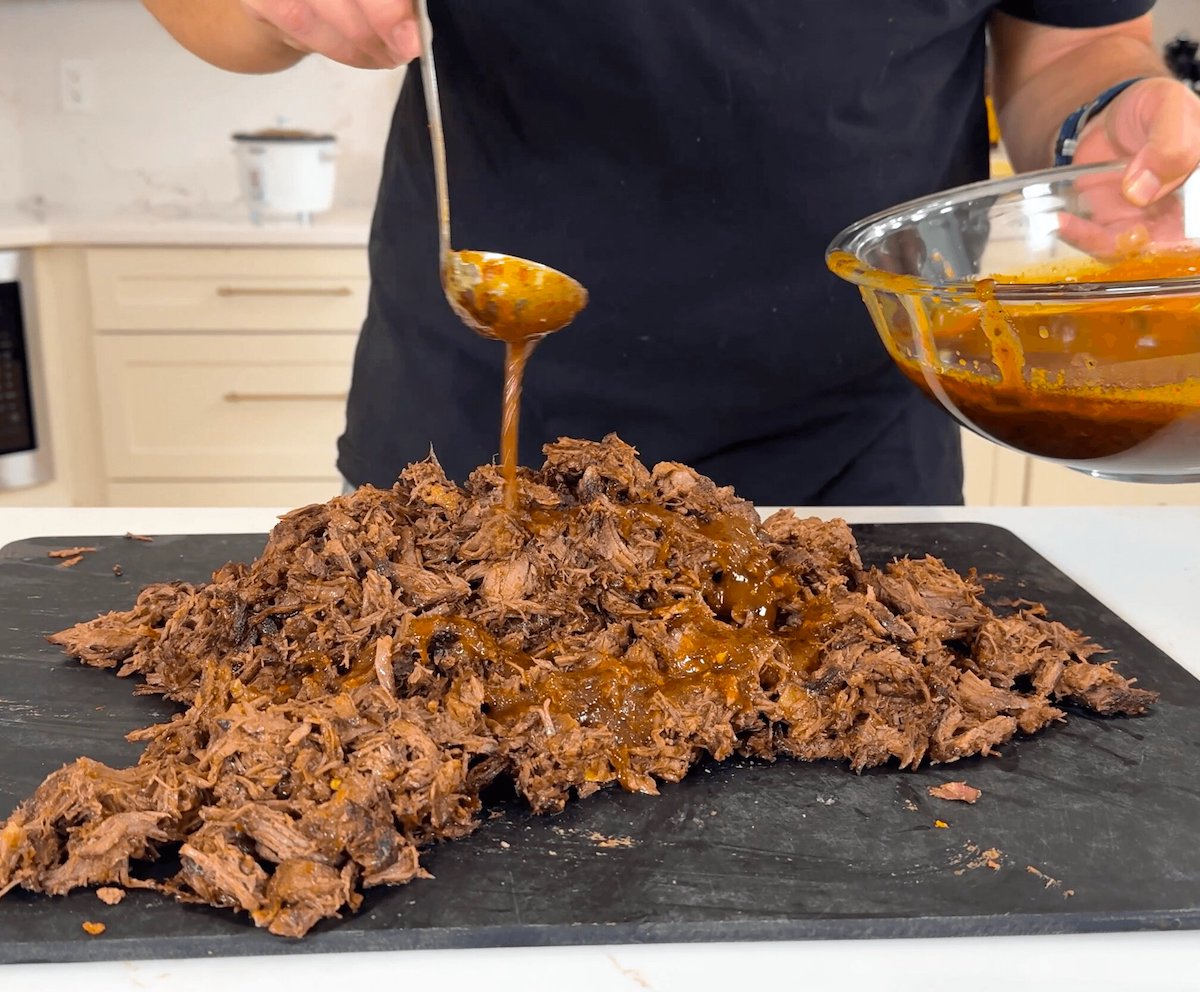
Taste the strained consommé for seasoning and add salt if needed. At this point, you can ladle some of the consommé over the shredded beef for added flavor, or reduce it further on the stove for a more concentrated thicker sauce. The fat you skimmed off goes into a separate vessel for dipping tortillas to make birria tacos.
Recipe Tips
Don’t over-salt the meat upfront: You’re seasoning the beef before a long braise. The salt concentrates as the liquid reduces. Season the meat lightly with kosher salt before braising and add additional salt at the end if needed.
Work in batches when searing: Overcrowding the pot causes the beef to steam instead of sear. Give each piece space and patience — a proper sear is where a lot of flavor is built.
Remove the bay leaves and cinnamon before blending: These are fine whole but will make the sauce bitter and gritty if blended. Fish them out before you blend.
Fat is non-negotiable: If you don’t have a fat layer floating on top of your consommé after braising, you didn’t have enough fat in your beef selection. This is the primary reason birria tacos come out soggy — people are dipping into consommé, not fat. Skim it carefully and keep it separate.
Let the meat rest before shredding: Resting allows the juices to redistribute. Shredding too early means dry meat and lost juice.
Check your silver skin on the ribs: The thin membrane on the back of the ribs can be tough. Pull it off after braising and discard.
The consommé is the secret weapon: After you separate the fat, ladle some consommé over the shredded meat before serving. The meat absorbs a ton of flavor this way. This is the step most restaurant versions skip.
The chuck roast should shred easily with two forks with almost no resistance. If it’s still tight or springy, it needs more time. The rib meat should be falling off the bone cleanly. Don’t rush it — undercooked birria is one of the most common mistakes.
Birria is actually better the next day. The fat solidifies on top of the consommé overnight in the refrigerator, making it extremely easy to skim off cleanly. The flavors also deepen and meld overnight. Reheat gently over low heat.
Stored in an airtight container, birria keeps well in the refrigerator for 4–5 days. It also freezes beautifully for up to 3 months. Freeze the meat and consommé separately for easiest use.
Yes. Beef short ribs and oxtail are the more traditional substitutes for goat, and they’re excellent if price isn’t a concern. Beef shank also works well. The key is to use a combination of a rich braising cut (like chuck) and something with significant bone-in fat (like ribs or shank). Avoid lean cuts — they’ll give you tender meat but a thin, flavorless consommé.
Beef Birria
Ingredients
- 4½ – 5 lbs beef chuck roast
- 4 – 5 lbs beef back ribs
- kosher salt
- 3 tablespoons beef tallow or cooking oil
- 8 dried guajillo peppers stemmed and seeded
- 3 dried pasilla peppers stemmed and seeded
- 4 dried arbol peppers stemmed and seeded
- 1 yellow onion quartered, skin removed
- 1 head garlic cloves separated and peeled
- 3 roma tomatoes quartered
- 1 Mexican cinnamon stick about 2” length
- 2 bay leaves
- 1 teaspoon Mexican oregano
- 1 teaspoon ground coriander
- ½ teaspoon ground cumin
- ½ teaspoon chili powder
- ½ teaspoon ground ginger
- ½ teaspoon marjoram
- 2 tablespoons black peppercorns
- 2 tablespoons apple cider vinegar
- 4 cups beef stock
- Water as needed to cover the beef while stewing
Instructions
- Roast the beef back ribs: Preheat oven to 475°F. Season rack of ribs lightly with kosher salt. Roast on a sheet tray for 12-15 minutes at 475℉, then turn oven up to broil and cook an additional 5-10 minutes to achieve deep caramelization. Remove and set aside.
- Prepare two large pots: While the ribs are cooking, prepare two large pots on the stovetop. One pot will be for toasting the peppers and cooking the vegetables in beef stock, and the other (larger) pot will be for searing the chuck roast and stewing down the beef with the blended birria sauce.
- Sear the chuck roast: While the ribs are roasting, cut the chuck roast into large chunks, about 2½ – 3". Season lightly with salt. Heat 2 tablespoons of beef tallow in the larger stock pot over medium-high heat. Working in batches, sear the chuck roast on all sides until deeply browned. Remove and set aside.

- Prepare the dried chiles: Stem and seed all dried peppers. In a different dry pot over medium heat, toast the peppers for 2–3 minutes until fragrant. Do not let them burn. Remove and set aside.
- Char the aromatics: In the same pot that you used to toast the peppers, add about 1 tablespoon beef tallow. Char the onion quarters over medium heat until softened and charred on the edges, about 5–8 minutes. During the last few minutes, add the garlic cloves.
- Build and steep the chile sauce: To the pot with the onions and garlic, add the toasted chiles, cinnamon stick, bay leaves, peppercorns, all dried spices, roma tomatoes, and apple cider vinegar. Pour in the 4 cups of beef stock. Bring to a boil, then turn off the heat, cover and steep for 15–20 minutes until chiles are fully softened.
- Blend and strain: Remove and discard the bay leaves and cinnamon stick. Blend the chile mixture until completely smooth, venting the blender lid carefully because the liquid is hot. Strain through a fine mesh strainer back into the pot, just to make sure there aren't any large chunks left.
- Braise: Cut the beef back ribs into individual ribs. Place the seared chuck roast and the roasted beef back ribs in the larger stock pot. Pour in the blended chile sauce. Add water until the beef is just barely covered, about 2 cups depending on the size of your pot. Bring to a boil, then reduce to a low simmer. Braise for 2.5 to 3 hours, or until the chuck roast is completely pull-apart tender and the rib meat is falling off the bone.
- Rest and shred: Remove all the beef from the pot and let rest for 10–15 minutes. Transfer all of the leftover sauce from the pot to a large bowl. Shred the chuck roast with two forks. Pull the rib meat off the bones and discard any silver skin. Combine all the shredded meat.
- Skim the fat: Carefully skim the fat layer from the top of the sauce using a ladle or fat separator. Reserve this fat separately – it is pure concentrated beef flavor and is essential for dipping tortillas before frying for crispy tacos.
- Season and finish: Taste the birria sauce and adjust salt as needed. Ladle some sauce over the shredded meat before serving to saturate it with flavor. Serve the sauce on the side for dipping, or ladle more over the beef in a bowl and serve as a stew.


Notes
- The beef back ribs can be cut down by your butcher if they’re too large for your pot. You can also substitute beef short ribs.
- If you save beef brisket trimmings or other beef fat, this is a great place to render them and use them in place of tallow.
- The consommé and shredded beef freeze beautifully. Freeze separately for up to 3 months.
- Birria improves overnight. If you have time, braise the day before and refrigerate — the fat will solidify and lift off cleanly, and the flavors will deepen significantly.
- I like to completely separate the fat from the sauce by allowing the sauce to cool and harden in the bowl for 15 minutes while the meat rests. The fat can be reheated in a skillet and used to crisp up the tortillas for birria tacos or to fry the outside tortilla of birria burritos.
- You can heat the birria sauce in a large skillet (without the fat) to reduce it for a concentrated and thicker sauce for burritos and more.


Get More Griddle Recipes!
Follow The Flat Top King on YouTube for more recipes and tips for mastering your griddle!